
Table of Contents
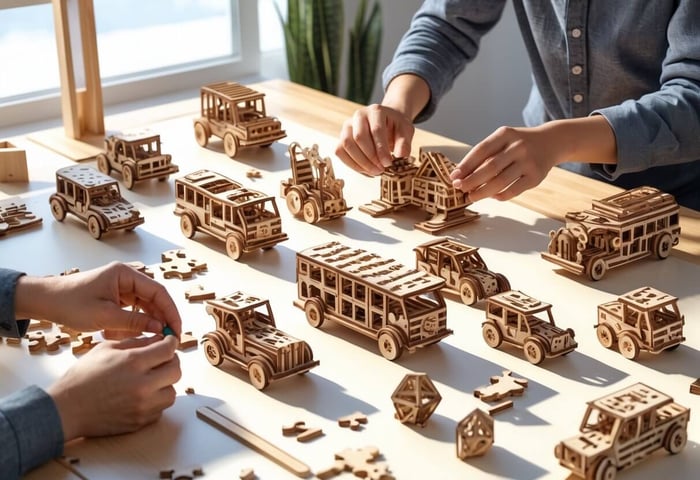
Our Supporting Artisans who helped curate the products on this site will share commissions for purchases made through links in this post.3D wooden puzzles combine a satisfying mental workout with hands-on creativity, drawing in puzzle lovers of all backgrounds. These clever kits turn flat wooden sheets into eye-catching objects—think ships, animals, buildings, or even mechanical gadgets that look great on a shelf once you’re done.
Picking the right puzzle and using the right assembly habits can mean the difference between a fun project and a stressful one. It mostly comes down to matching your puzzle’s difficulty to your skills, and knowing the basics that make assembly go smoothly.
Maybe you want to unwind, sharpen your problem-solving, or just add something cool to your living room. Either way, knowing how to pick and assemble a 3D wooden puzzle will help you get the most out of this hobby. The real trick is patience, staying organized, and picking up some tried-and-true techniques from experienced builders.
Key Takeaways
- Pick a puzzle that matches your skill level and fits the time you want to spend
- A good workspace and organized pieces make assembly way easier
- 3D wooden puzzles are both mentally engaging and make beautiful, functional decor
What Are 3D Wood Puzzles?

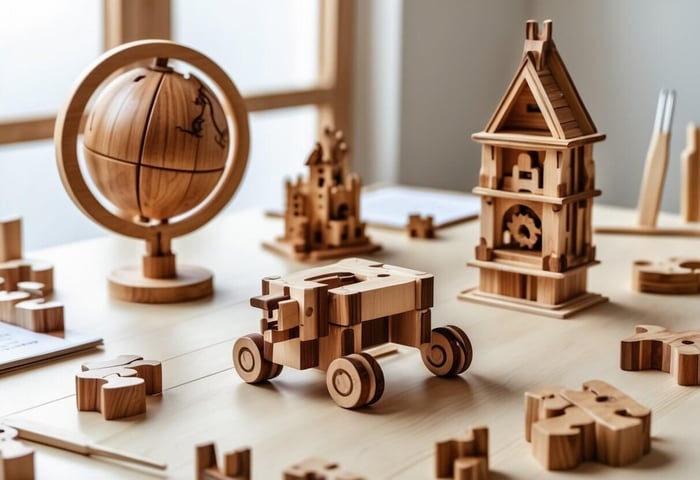
3D wooden puzzles are models built from precisely cut wood pieces that lock together—no glue or fancy tools needed. Instead of a flat image, you end up with something you can hold, like a tiny car, animal, or building.
Defining 3D Wooden Puzzles
These puzzles use laser-cut wooden sheets, with each piece designed to fit into tabs, slots, or joints. Most of the time, you’ll see birch plywood or MDF. The pieces come in flat sheets, and you just pop them out before starting.
Puzzles rely on a friction-fit system—basically, the pieces hold together because the cuts are so precise. No glue, screws, or weird tools required.
Some finished models actually move! You’ll find gears, springs, and other parts that really work, which is honestly pretty satisfying.
Popular materials include:
- Birch plywood (tough and reliable)
- MDF (cheaper, does the job)
- Baltic birch (for those who want something a bit fancier)
Lucky Cat 3D Wooden Puzzle Kit - Fun DIY Model for All Ages

$14.99
Introducing the Lucky Cat 3D Wooden Puzzle Kit, an engaging DIY model perfect for all ages. Crafted from 72 precision-cut wooden pieces, this charming cat puzzle is designed for easy assembly, making it an ideal choice for beginners. Spend approximately… read more
Differences from Traditional Puzzles
Regular jigsaw puzzles? Those are flat. 3D wooden puzzles? They build actual objects you can display or play with.
Instead of matching colors and patterns, you’re lining up mechanical connections. Assembly feels more like building a model kit than doing a jigsaw.
Jigsaw puzzles usually start from the edges. With wooden models, you just follow the steps in the instructions, one by one.
Some kits are quick—30 minutes or so. Others might take you a whole weekend (or two) to finish.
And once you’re done, you’ve got something you can show off, not just a puzzle you’ll break apart and put back in the box.
Types and Mechanisms
3D wooden puzzles come in all sorts of flavors. Each type uses its own building tricks and can range from simple to seriously complex.
Mechanical models have gears, cranks, or moving pieces—think music boxes, clocks, marble runs. They’re great if you’re curious about how things work.
Architectural models recreate famous buildings, focusing on details and proportions.
Vehicle models (cars, planes, ships) sometimes have working wheels or spinning propellers.
Animal figures can be simple or surprisingly lifelike, with joints that move or little touches that make them pop.
Assembly mechanisms include:
- Tab and slot connections
- Gears and moving parts
- Rubber band motors
- Spring-loaded bits
How to Choose the Right 3D Wood Puzzle
When you’re picking a 3D wooden puzzle, you’ll want to think about difficulty, age suitability, wood quality, cutting precision, and whether the brand is any good.
Assessing Difficulty Levels
Puzzles range from super simple (about 50 pieces) to massive builds with over 500 parts. Be honest about your experience and how much time you’re willing to put in.
Beginner kits usually have 50-150 pieces, big parts, and clear instructions. You’ll probably finish one in 2-4 hours—great for a rainy afternoon.
Intermediate puzzles (150-300 pieces) start mixing in gears or trickier steps. Expect to spend 4-8 hours, maybe over a couple sessions.
Advanced puzzles (over 300 pieces) are for folks who love a challenge. These can have multiple moving parts, detailed architecture, and take 8-15 hours—or more if you take your time.
What makes a puzzle tricky?
- Number of pieces
- Moving parts
- How complicated the assembly is
- How good the instructions are
- If you need any extra tools
Age Recommendations
Manufacturers usually include age guidelines—they’re there for safety and to make sure the puzzle isn’t too tough or too boring.
Kids ages 8-12 do best with simpler, 50-100 piece kits. Look for big pieces and smooth edges—nobody wants a splinter or a choking hazard.
Teens (13-17) can usually handle more complex puzzles (100-250 pieces) and might enjoy models with some moving parts.
For adults, there’s basically no limit. Some kits are incredibly detailed and need steady hands and real patience.
Things to check for age-appropriate kits:
- Size and safety of pieces
- How tricky the instructions are
- Dexterity needed
- How long it takes to finish
- Educational content
Romantic Carousel Music Box 3D Puzzle for Adults

$36.99
Unveil the magic of creativity with the Romantic Carousel Music Box 3D Puzzle for Adults. Immerse yourself in a journey of intricate craftsmanship and delightful design with this remarkable mechanical DIY wooden toy. Specifically crafted to engage and inspire, this… read more
Material Quality and Precision
Top-notch puzzles use hardwoods like maple, walnut, or cherry. These resist splitting and give you clean, smooth edges that fit together easily.
Laser-cut pieces are the gold standard—everything lines up perfectly and feels satisfying to assemble. Hand-cut puzzles can be a bit quirky, but sometimes that adds charm.
Look for wood that’s the same thickness across all pieces. If the pieces are uneven, you’ll struggle with assembly and might even break something.
The surface should feel smooth—no splinters, no rough patches. Good kits don’t need much sanding, and the wood usually comes pre-finished.
Signs of a quality puzzle:
- Made from hardwood
- Laser-cut pieces
- Smooth, safe surfaces
- Uniform thickness
- Clear, detailed instructions
Popular Brands and Series
Robotime is a big name, with everything from mechanical models to famous landmarks. Their kits are consistent and the instructions are usually solid.
Wooden City focuses on mechanical puzzles with moving parts—great for intermediate or advanced builders who like a challenge.
UGEARS makes high-end mechanical models packed with gears and moving bits. If you want a working toy at the end, check them out.
Rolife does a lot of architectural and decorative kits, especially mini buildings and dollhouse-style pieces.
If you’re on a budget, Hands Craft and Puzzle Master have affordable options for beginners who aren’t sure if they’ll get hooked yet.
It’s worth sticking with brands that have a solid rep—quality tends to be more reliable, and you’ll get better support if you hit a snag.
Essential Tools and Setup for Assembly
The right tools and a good workspace make assembling 3D wooden puzzles a lot less stressful. A clean, organized spot with decent lighting helps you avoid mistakes and keeps pieces from getting lost or broken.
Basic Tool Kit
Start with a sharp hobby or craft knife—removing pieces cleanly makes everything else easier. Fine-grit sandpaper (220 or higher) smooths rough edges so parts fit snugly without splintering.
Must-have tools:
- Hobby knife with extra blades
- Fine-grit sandpaper (220-320)
- Tweezers for tiny parts
- Clear-drying wood glue
- Small hammer or mallet for gentle taps
Tweezers come in handy for those miniature pieces that seem to disappear between your fingers. They give you more control, especially for delicate steps.
A dab of wood glue can help with loose joints, but don’t go overboard—too much glue can mess with moving parts.
Advanced Tools for Accurate Assembly
If you’re working on a complicated model, you’ll want a few extras. Mini clamps or binder clips hold things together while glue sets, so your hands are free.
Needle files are better than sandpaper for getting into tight corners or making tiny adjustments.
Other handy tools:
- Mini clamps for holding pieces
- Needle files for fine-tuning
- Magnifying glass for small parts
- Pin vise for drilling tiny holes
- Cutting mat to protect your table
A magnifying glass (or just a pair of reading glasses) helps with tiny details—especially if your eyes get tired after a while. Good lighting plus magnification really cuts down on eye strain.
If you need to drill a hole for a repair or mod, a pin vise is the way to go. Just take it slow, or you might split the wood.
Preparing Your Workspace
Before you even open your kit, set up a flat, stable table with plenty of light. Natural light is great, but a bright LED lamp works too.
Use small bowls or trays to sort pieces by type or assembly step. It’s way too easy to lose tiny parts if you just dump everything in a pile.
Workspace basics:
- Big, flat work surface
- Bright desk lamp
- Containers for sorting
- Cloth for wiping up glue
- Instructions within reach
Keep your cutting mat front and center for safe cutting. Place your tools close by, but not where you’ll knock them onto the floor.
Ventilation matters, especially if you’re using glue. Crack a window or set up a small fan to keep the air moving and help things dry faster.
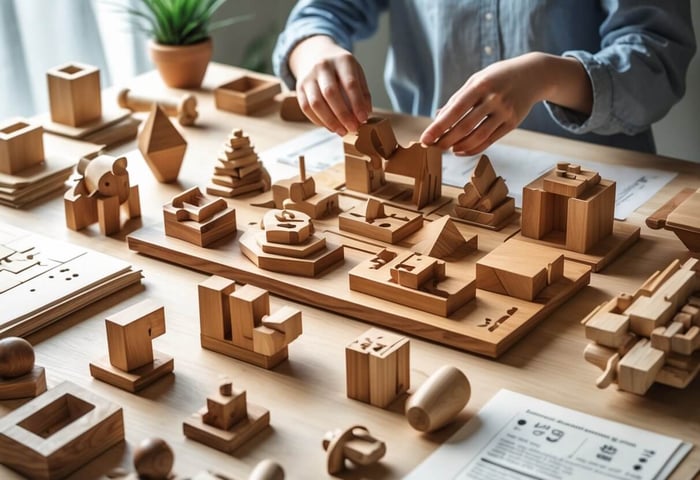
Step-by-Step Tips and Tricks for Building Success
You’ll have a much better time with 3D wooden puzzles if you read the instructions before jumping in, keep your pieces sorted, test fits as you go, and use a few simple tricks to avoid the usual headaches.
Reading and Understanding Instructions
Read through all the instructions before you even pick up a piece. You'll get a feel for the whole process that way—it's less stressful than jumping in blind.
Check out the diagram key right away. Those little symbols and arrows? They actually matter, and knowing what they mean saves a lot of confusion later.
Study the piece identification guide. Most puzzles label each wooden part with a number or letter so you can match them up to the steps.
Check for assembly order requirements. Some 3D wooden puzzles absolutely need to be built in a certain order. If you skip ahead, you might end up stuck or unable to fit something later.
Mark your progress as you go—just use a pencil to check off steps in your booklet. It's surprisingly easy to lose your place if you don't.
Pay close attention to directional arrows and rotation symbols. They tell you exactly how to orient each piece, and getting it wrong can throw off the whole build.
If the instructions get confusing (and sometimes they do), try searching for online videos or guides specific to your puzzle. Manufacturers often have extra help if you dig around their websites.
Organizing Wooden Pieces
Sort everything by size and shape before you start. Seriously, it makes a difference. Small bowls or a divided tray work well for keeping groups apart.
Group similar pieces together. Toss all the little connectors in one spot, and keep the bigger structural parts somewhere else.
Match pieces to the diagrams as you go. This way, you won't waste time hunting for the right part mid-build.
Keep your workspace clean and bright. Good lighting helps you spot tiny details you might otherwise miss.
| Organization Method | Best For |
|---|---|
| Size sorting | Complex puzzles with many pieces |
| Shape grouping | Mechanical models with different part types |
| Step-by-step layout | Beginners learning the process |
Check each piece for damage before you use it. Look for cracks, splinters, or missing tabs—those can mess up your assembly later.
ROBOTIME Illuminated 3D Wooden Puzzle Globe with LED Light - Unique Desk Decor and Gift for Adults

$50.34
$54.99
Introducing the ROBOTIME Illuminated 3D Wooden Puzzle Globe with LED Light, a stunning blend of artistry and functionality that is perfect for any adult seeking a unique desk décor piece or an extraordinary gift. This is not just a 3D… read more
Test Fitting and Adjustments
Never force pieces together. If something doesn't fit, double-check the instructions and how you're holding the piece. Forcing it usually just leads to broken parts.
Test connections gently before you push them in all the way. It's way too easy to snap a thin piece if you're not careful.
Look for alignment marks or tiny notches—lots of 3D wooden puzzles add these to show you exactly how things should line up.
If the fit feels tight, check for stray wood shavings or debris in the connection points. A soft brush works well for clearing those out.
If a piece just won't go, try rotating it a little or approaching from a different angle. Sometimes a small tweak makes it slide right in.
Make small adjustments gradually. Move pieces in tiny increments—big motions tend to cause damage.
Use good lighting to see the details. Dim lighting leads to mistakes and broken parts, trust me.
Minimizing Assembly Errors
Double-check piece numbers against the instructions before each step. It's a pain to undo mistakes if you use the wrong part.
Work slowly and deliberately. Rushing almost always leads to errors that are tough to fix later.
Take breaks if you're building for a while. Tired hands slip, and you'll end up forcing something or making a mistake.
Keep a little file or sandpaper handy for minor tweaks. Sometimes a piece just needs a tiny adjustment to fit right.
If you mess up, stop and backtrack instead of building on top of the error. Fixing it early saves a headache later.
Build subassemblies separately when you can. It's easier to spot issues before everything's locked together.
Save the most delicate connections for last. Get the main structure solid before you add any little decorative bits that could snap off.
Enhancing the Experience: Advanced Techniques
Once you get the hang of basic assembly, you can really make your wooden puzzles stand out. Painting, staining, and mounting them securely turns these models into lasting display pieces. A little glue in the right places adds stability, and finishing techniques help protect your work for years.
Customization and Personalization
You can turn your 3D wooden puzzle into something special with a bit of customization. Start by lightly sanding the rough edges with 220-grit sandpaper to get everything smooth.
Staining Options:
- Water-based stains for a lighter look
- Oil-based stains if you want deeper colors
- Gel stains for even results on tricky wood grain
Apply stain with a foam brush in thin layers. Let each coat dry before you add another—rushing it never works out well.
Paint gives you more creative freedom than stain. Use acrylic paints meant for wood, and slap on a primer coat first so the paint actually sticks.
Color Schemes to Consider:
- Natural wood tones for a classic vibe
- Bright colors if it's going in a kid's room
- Metallic finishes for a modern look
If you're feeling fancy, try weathering effects or highlight certain features. Small brushes help with those tiny, detailed areas.
Using Glue and Other Adhesives
Most wooden puzzles stay together without glue, but a little adhesive gives display models permanent stability. Pick your glue based on what you need.
Wood Glue Types:
- PVA glue for most jobs
- Polyurethane glue when you want extra strength
- Hide glue if you might want to take things apart later
Use glue sparingly—just a little on joint surfaces. Too much makes a mess and actually weakens the connection.
Work on small sections at a time. Once the glue's on, you've only got so long before it starts to set up.
Hold pieces together with clamps or rubber bands while the glue dries. Most glues need a full day to cure completely.
Application Tips:
- Wipe off extra glue right away with a damp cloth
- Test glue on scrap pieces first if you're unsure
- Work somewhere with good airflow
Leave a few joints unglued if you think you might want to take the puzzle apart later on.
Finishing and Displaying Completed Models
The right finish protects your 3D wooden puzzle and makes it look even better. Pick your finish based on where you'll display it.
Clear Finish Options:
- Polyurethane for tough protection
- Shellac if you want something that dries quickly
- Wax for a natural feel and easy touch-ups
Apply thin coats with a good brush or foam applicator. Sand lightly between coats with fine-grit sandpaper for a smooth finish.
Display Considerations:
- Put models on stable surfaces, out of direct sunlight
- Dust with a soft, dry cloth now and then
- Keep them away from humid spots like bathrooms
Try making custom display bases from matching or contrasting materials. If your model has transparent parts, a few LED lights underneath can look pretty cool.
Glass display cases protect valuable or fragile puzzles from dust and accidents but still let you show them off.
Mount wall displays securely with hardware that matches the puzzle's weight. It's worth checking the mounting points now and then to make sure they're still solid.
Benefits of 3D Wood Puzzles
3D wooden puzzles offer a lot more than just something to do with your hands. They sharpen your mind, and you end up with a beautiful display piece you can actually be proud of.
Boosting Problem-Solving Skills
Working through a 3D wooden puzzle really forces your brain to think in three dimensions. You have to picture how the flat pieces will connect and build up into a finished model.
Spatial reasoning gets a workout as you mentally rotate pieces before putting them together. This skill comes in handy for all sorts of real-life stuff—like reading maps or putting together furniture.
Your critical thinking sharpens as you hit roadblocks. When a piece doesn't fit, you have to figure out why and try something different.
The puzzles challenge you to:
- Plan assembly steps ahead of time
- Spot structural relationships
- Solve tricky geometric problems
Each section you finish builds your confidence. You start to see big problems as a bunch of smaller, doable steps.
Encouraging Patience and Focus
3D wooden puzzles take time—sometimes hours, sometimes days. Sticking with them helps you build up your focus and patience.
Patience naturally develops as you work through tough spots. Rushing only leads to mistakes you’ll have to fix later.
There's something meditative about the repetitive actions—sorting, fitting, placing pieces. It can really help lower stress and make you forget about your phone for a while.
Benefits include:
- Better attention span
- Less stress
- More mindfulness
- Time away from screens
Honestly, the slow pace teaches you to enjoy the process—not just the finished product.
Decorative and Collectible Value
Finished 3D wooden puzzles make impressive display pieces. Unlike cardboard puzzles, these models hold their shape and good looks for years.
Popular display themes include famous landmarks, classic vehicles, and mechanical models. They're great conversation starters and show off your effort.
The wood grain brings a natural warmth to any room. You can stain or paint them to match your style if you want.
Collectible aspects make them feel like real investments:
- Limited edition runs
- Models by well-known artists
- Increasingly complex designs
- Collaborations with popular brands
Your finished puzzles become trophies—reminders of the hours you put in and what you accomplished.
Frequently Asked Questions
Plenty of builders have questions about assembly, caring for wood, and figuring out the right difficulty level. Concerns usually revolve around avoiding wood damage, finding eco-friendly options, and picking puzzles that fit the builder's age and skill.
FAQs
What are the best techniques for assembling complex 3D wood puzzles without using glue?
Start by sorting pieces into groups by size, shape, and color patterns. It just makes it easier to grab what you need when you need it.
Work on flat surfaces first. Build the base or foundation before moving on to anything vertical.
Use gentle pressure when connecting parts. The joints should fit snugly, but you shouldn't have to force them.
Test fit each piece before locking it in. If it doesn't slide in easily, double-check the orientation.
Keep the instruction manual handy. Complex puzzles often require you to follow a specific order for everything to work.
Take breaks if you get frustrated. Sometimes stepping away for a bit helps you see the solution.
How can I prevent my wooden puzzle pieces from warping or swelling over time?
Store your puzzle somewhere dry and out of direct sunlight. Moisture and heat will warp wood faster than you'd think.
Finished puzzles don't do well in humid places like bathrooms or basements. Those spots can really mess up the wood over time.
Use a dehumidifier in rooms where you display your puzzles. It helps keep the air dry and the wood safe.
Keep puzzles away from heating vents or radiators. Sudden temperature changes can crack or split the wood.
Handle pieces gently as you build. Rough handling can cause tiny cracks that only get worse later.
If you want extra protection, try a thin coat of wood preservative on finished puzzles. It helps guard against moisture and bugs.
What are some challenging 3D wood puzzles for experienced builders?
If you’re up for a real challenge, architectural models—think Gothic cathedrals or iconic landmarks—come with hundreds of intricate pieces. They’ll definitely push your spatial reasoning skills.
Mechanical puzzles with moving parts, like gear systems or pendulum clocks, really make you wrestle with complex engineering. You’ll probably need to study how each part interacts before it all clicks together.
Large vehicle models, such as ships or aircraft carriers, easily top 500 pieces. These can take days to finish, especially if you’re aiming for a clean build.
Multi-level buildings with interior details demand patience and a steady hand. You have to get each floor to line up just right—otherwise, the whole thing feels a bit off.
Curved structures—domes, spheres, anything that bends—can be a headache. They force you to build in three dimensions, and the usual tricks don’t always work.
And then there are fantasy models: dragons, castles, that sort of thing. They mix artistic flair with tricky construction, plus you have to be careful not to snap off any fragile decorative bits.
Are there any eco-friendly 3D wood puzzles available on the market?
Plenty of brands now use sustainable wood like bamboo or material from certified forests. Since bamboo grows quickly, it’s a solid pick if you’re worried about harming old-growth forests.
I’d suggest picking brands that stick to water-based stains and finishes—those tend to have fewer nasty chemicals compared to the old-school stuff.
Some companies really cut down on packaging or use recycled materials. It’s a small thing, but it helps shrink the environmental footprint.
If you can, go for puzzles made closer to home. Shorter shipping distances mean less carbon from transportation.
Keep an eye out for FSC (Forest Stewardship Council) certification. That label means the wood comes from responsibly managed forests, so you know you’re not supporting bad practices.
Skip puzzles with plastic bits or synthetic glues. All-wood models break down naturally when you’re done with them, which feels better in the long run.
What tools or accessories can enhance the building experience for 3D wood puzzles?
A cutting mat does wonders to keep your table safe and gives you some handy measurement lines. Plus, it stops pieces from slipping all over the place.
Fine-tipped tweezers are a lifesaver for handling tiny or fragile parts. Your fingers just can’t match that level of control.
Sometimes you just need a magnifying glass—especially when you’re squinting at tiny connectors. It saves your eyes during marathon build sessions.
Small containers or trays help keep all the little pieces sorted. If you label them, you’ll spend a lot less time hunting for that one elusive part.
Decent lighting is crucial. I’d go for a desk lamp you can move around—makes it way easier to spot mistakes before they happen.
Sandpaper comes in handy for smoothing out rough edges on laser-cut parts. A fine grit does the trick without chewing up the wood.
How do I choose a 3D wood puzzle that is appropriate for different age groups?
For kids under 8, stick with puzzles that have big pieces and easy designs—think animals or simple vehicles. Little hands do best with chunky parts.
If they're between 8 and 12, they can usually manage something a bit tougher, maybe 50 to 100 pieces. Buildings or cars seem to hit the sweet spot for this crowd, offering a challenge without turning it into a headache.
Teenagers tend to go for detailed models—200 to 300 pieces isn't out of reach. Landmarks, military vehicles, things with lots of little parts—these seem to catch their interest.
Adults? They often want something that takes time and focus, so puzzles with 500 or more pieces and lots of intricate details fit the bill. Architectural models or mechanical designs can be especially satisfying.
Always look at the manufacturer's age recommendations on the box. They're usually thinking about both safety and skill.
But honestly, consider the person's experience too, not just their age. A 10-year-old who's been building for years might breeze through an advanced puzzle while an adult just starting out could get stuck.