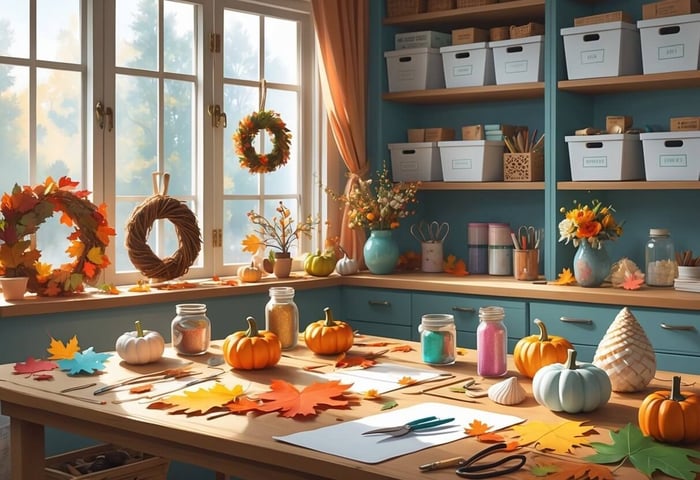

Table of Contents
Our Supporting Artisans who helped curate the products on this site will share commissions for purchases made through links in this post.Wood-burned wall art can turn plain wooden pieces into cozy focal points, bringing warmth and personality to your space. Pyrography, as it’s technically called, gives you a hands-on way to create custom designs that suit your vibe and match your decor—no need to settle for generic art.

With just a few basic tools, you can get the hang of wood burning and end up with wall art that looks surprisingly polished. You use heated metal tips to burn your designs right into the wood. Wood burning’s pretty popular these days, and you’ll find starter kits at just about any craft store.
Whether you’re into bold geometric patterns or want to try your hand at nature-inspired scenes, there’s tons of room to get creative. Personalize your art with names, dates, or symbols that mean something to you. These projects can be as easy or as complex as you want, so anyone can jump in and make something unique for their home.
Key Takeaways
- You only need basic tools and supplies, which are widely available at craft shops
- There’s a range of wall art styles you can try, from simple shapes to detailed scenes, depending on your burning technique
- Once you learn the basics, you can use your skills on smaller items like coasters, frames, or even kitchen utensils
Essential Tools and Materials

Before you get started, make sure you have the right tools and materials. Your pyrography pen, safety gear, wood choice, and a bit of planning all play a role in how your project turns out.
Selecting Pyrography Tools
The wood burning pen is the star of the show. Pick one with adjustable temperature—somewhere in the 800 to 1200 degree Fahrenheit range is ideal.
Pen-style burners are easier to control for detail work. If you can, grab a model with interchangeable tips so you can switch up your line weight and texture as you go.
Handy tip types to keep around:
- Fine point tips for details and lettering
- Shader tips for bigger areas
- Calligraphy tips for fancy text
- Texturing tips for things like bark or fabric effects
Corded burners keep the heat steady, which makes life easier. It’s worth investing in a stand or holder for your hot tips too. Take care of your tools, and they’ll last ages.
Must-Have Safety Gear
Wood burning puts out smoke and fine dust, so don’t skip the safety stuff. Safety glasses will shield your eyes from debris and the occasional slip.
A dust mask or respirator keeps you from breathing in wood particles. N95 masks are usually fine, but if you’re going all day, look for P100 filters.
Work somewhere with good airflow, or set up a fan to move the air away from you. Always keep a fire extinguisher within reach—better safe than sorry.
Heat-resistant gloves can save your hand from accidental burns, especially when you’re adjusting the wood. Silicone finger guards are a good alternative if you want a bit more dexterity.
Have a first aid kit nearby, just in case. Don’t leave your wood burner plugged in and unattended.
Choosing the Right Wood
Soft woods like basswood, pine, or poplar are easy to burn and don’t make a ton of smoke. Basswood’s a favorite for beginners thanks to its smooth, even grain.
Skip treated lumber, plywood, or anything with lots of resin—they can give off nasty fumes when burned.
For wall art, boards between 1/4" and 3/4" thick hit the sweet spot. Thinner boards might warp, and anything thicker just gets heavy.
If you can, grab pre-sanded boards to save yourself some prep time. Most hardware stores carry what you need.
Reclaimed wood adds a cool, rustic look, but you’ll need to sand it down well. Prepping your surface makes a big difference in how clean your burns look.
Project Planning and Sizing
Measure your wall space before you start cutting. Popular art sizes are 12x16, 16x20, or 18x24 inches, but you can go bigger or smaller if you want.
Graph paper is great for sketching out your design to scale. Use carbon paper or a stencil to transfer your pattern for accuracy.
A miter saw will help you get clean cuts for geometric shapes or multi-panel art. Table saws are better if you’re ripping down larger boards.
Think about how you’ll hang your piece before you start burning—pre-drill any mounting holes so you don’t risk cracking your finished art.
Try out your design on scrap wood first, especially if it’s complicated. You’ll get a feel for the tool and temperature control before you commit to your final piece.
Step-by-Step Guide to Creating Wood-Burned Wall Art

Making wood-burned wall art is all about choosing the right wood, transferring your pattern, burning with control, and mounting the finished piece securely.
Preparing and Cutting the Wood
Pick a softwood like pine or basswood if you’re just starting out. Hardwoods like oak take more heat and patience.
Cut your pieces to size using a miter or circular saw. Sand everything down to at least 220 grit for a nice, smooth surface.
Grab these materials:
- 1x2 inch furring strips or any scrap wood you’ve got
- 1/4 inch plywood for the backing
- Sandpaper (120, 180, 220 grit)
- Measuring tape and pencil
Wipe off the wood with a dry cloth to get rid of dust. Any leftover dirt or oil can mess with your burns.
Check for knots or weird spots that might burn unevenly. Mark them so you can work around them when placing your pattern.
Transferring and Drawing Patterns
Print your design at the size you want, then tape it to the wood.
Slip a sheet of carbon paper underneath and trace with a ballpoint pen—the lines will transfer right onto the wood.
Other ways to transfer patterns:
- Use carbon paper
- Draw directly with pencil
- Cut a template from cardboard and trace around it
Once you pull off the paper, darken any faint lines with a pencil. Keep them light enough so you can burn over them easily.
If you’re new to this, start with simple geometric shapes. Save the detailed stuff for later, once your hand’s steadier.
Burning Techniques for DIY Decor
Heat up your pen to a medium setting. Always test on a scrap piece first to dial in the right temperature.
Basic strokes to practice:
- Outlining: Try for steady, even lines
- Shading: Use quick, light dotting
- Filling: Go with overlapping circles
Move slowly and keep your pressure even. Go too fast and you’ll get light burns; too slow and things get dark quick.
Heavy pressure digs into the wood, so try to keep it gentle and consistent. Work top to bottom—otherwise, your hand might smudge what you’ve already finished.
Let the wood cool down between sections. If it’s still hot, it might keep burning a bit after you lift the pen.
Finishing and Mounting
Lightly sand with 320 grit to smooth any rough edges, but don’t overdo it or you’ll fade your design.
Rub on a coat of paste wax or water-based polyurethane to protect the wood and bring out the contrast in your burns.
Mounting ideas:
- Keyhole brackets for single panels
- French cleat system for heavier pieces
- Picture wire for lighter art
Attach your hardware before you apply the finish so you don’t scratch up the front. If you’re making a multi-piece design, glue everything to a plywood backing for stability—it’ll be way easier to hang.
Find your wall studs for heavier pieces, and use the right anchors for your wall type and the weight of your art.
Geometric Wood-Burned Wall Art Projects
Geometric wood-burned art’s all about careful planning and steady hands. You’ll sketch out your layout, cut the wood with precision, and use controlled burning to pull off crisp, eye-catching patterns.
Planning Geometric Designs
Start by doodling your pattern on paper—triangles, diamonds, hexagons, whatever feels right. Beginners usually have an easier time with simple shapes.
Careful measurement and symmetry matter here. Use a ruler and compass to keep things proportional and tidy.
Planning tools you’ll want:
- Graph paper for keeping things to scale
- Compass for neat circles or curves
- Protractor for sharp angles
- Pencil for sketching and tweaks
Think about the finished size; a 17" x 26" piece fits most rooms nicely. Decide which areas you’ll burn and which will stay natural for contrast.
Test your design on scrap wood first—you’ll catch any issues before they mess up your final piece.
Cutting and Arranging Wood Pieces
Use a miter saw to cut your strips for clean angles. Most DIY geometric projects use 1x2 furring strips cut to length.
Double-check your measurements before you start cutting, and label each piece so you don’t get mixed up during assembly.
Cutting order that works well:
- Cut all the non-burned pieces first
- Cut the pieces you’ll burn, leaving them a little long
- Burn your design, then trim those pieces to fit
- Sand the non-burned pieces to 220 grit for a smooth finish
Make your plywood base just a bit smaller than your planned art—¼" thick backing is plenty strong without making it heavy.
Do a dry fit before you glue anything down. This way, you can tweak your layout if something looks off. Number the pieces so you keep track of where everything goes.
Creating Geometric Pyrography Effects
Grab a flame torch and get that burned finish using the Shou Sugi Ban technique. Seriously, make sure you’re working somewhere with plenty of airflow and don’t skip the safety gear.
Burn each piece on its own if you want things to look even. If you try burning a bunch at once, you’ll just end up with patchy, uneven results.
Burning technique:
- Keep your hand speed pretty steady
- Move the torch smoothly—no jerky stops
- Try to heat all the surfaces equally
- Stop once you get a deep brown; don’t let it turn black and crumbly
Right after burning, go at the pieces with a wire brush. This scrubs away loose char and lets the real color show through.
Never sand burned pieces. The burn only sits on the surface. Sanding will just wipe out your hard work and show raw wood underneath.
Stick the burned pieces onto your project while they’re still a bit warm. They’ll stick better that way. Use wood glue, but go easy—too much and it’ll ooze out and mess up your finish.
Creative Wood-Burning Ideas for Different Wall Art Styles
Wood burning patterns can turn plain wood into something eye-catching for your walls. Whether you go for natural themes or custom lettering, there’s a lot of room to make something that feels personal and unique.
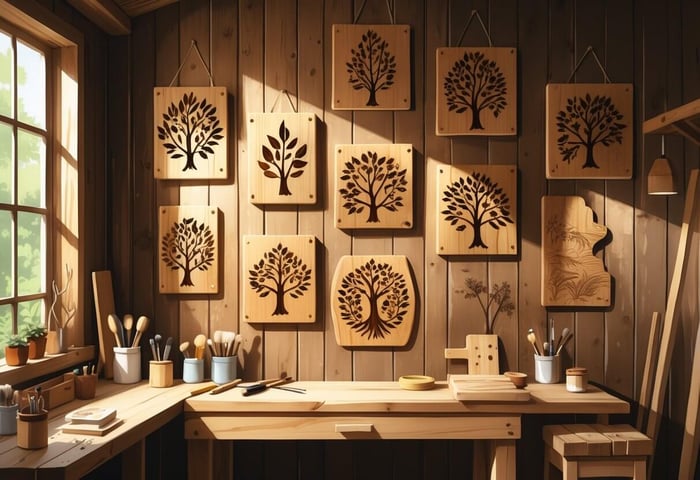
Nature-Inspired and Abstract Patterns
Nature themes just work for wood-burned wall art. Think tree silhouettes, leaves, even mountain scenes—they add a calming vibe to any space.
Simple nature patterns like feathers, branches, or flowers are great if you’re starting out. They’re easy to trace and you don’t have to fuss over the temperature too much.
If you want a challenge, try a detailed forest scene. Start with faint mountain shapes in the background, then layer in trees up front with darker, crisper lines.
Abstract geometric patterns feel modern and fresh. Diamonds, triangles, and swooping curves can look really cool, especially if you’re into minimalism.
Repeating motifs like mandalas or tribal-inspired patterns work nicely on square or round pieces.
Popular nature motifs include:
- Botanical leaf collections
- Mountain range silhouettes
- Ocean wave patterns
- Star constellation maps
- Animal silhouettes
Personalized Quotes and Lettering
Lettering makes wood art feel personal. Family names, favorite quotes, or special dates—these touches make a house feel more like home.
Stick with simple fonts at first. Block letters or basic scripts are much easier to burn evenly than those super-fancy fonts.
Planning your layout helps a ton with text. Sketch it out on paper, measure your spacing, and only then transfer it to the wood.
Try mixing in little borders or doodles to frame your words. Even a simple swirl or line can make the whole thing pop.
Effective lettering techniques:
- Use stencils if you want your letters to match
- Practice on scrap wood before you commit
- Keep your hand steady—consistent pressure and speed matter
- Add decorative scrollwork or flourishes around the text
Combining Paint or Stain with Wood Burning
Mixing in paint or stain gives your burned designs more depth and color. Stain can really set off those burned lines, and a bit of paint adds a fun accent.
It usually works best to stain after you’ve done the burning. Dark walnut or cherry stains really make the patterns stand out.
Watercolor effects can look amazing. Try brushing on thin washes of color over your burned outlines—the wood grain still shows through, but you get that extra pop.
You can also paint certain areas before burning. Lighter colors work best underneath. Burn your design right over the painted spots for a cool layered effect.
Color combination tips:
- Test your color and burn combo on some scrap wood first
- Pick heat-resistant paints so nothing bubbles up
- Keep paint layers thin to avoid peeling
- Seal your finished piece with a clear coat to protect it
Expanding Your DIY Decor: Wood-Burned Designs for Small Home Items
Small wood-burned pieces like cutting boards, coasters, and kitchen utensils are a fun way to add rustic charm all over the house. They’re affordable, useful, and let you show off your pyrography skills without committing to a huge project.
Decorative Cutting Boards and Trays
Round cutting boards look great whether you hang them up or lay them flat. Burn a family name, a special date, or an inspiring quote right in the center for a personal touch.
Popular Design Ideas:
- Family monograms with the year you “established” your home
- Kitchen themes—herbs, utensils, you name it
- Seasonal designs for holidays
- Wedding dates for sweet anniversary gifts
Farmhouse trays get a big upgrade when you engrave your family name and a date. Suddenly, that everyday serving piece feels like an heirloom.
For serving boards, you could even section off areas for different foods—maybe mark the soup spot with a leaf wreath, or border the sandwich area. It’s practical and looks great on the table.
Temperature Tips:
- Use medium heat for crisp letter outlines
- Lower temps help with detailed patterns
- Always test on scrap wood so you don’t mess up your good piece
Wooden Coasters and Spoons as Wall Art
Coasters are perfect for practicing new patterns. You can make a matching set or just try out different designs that tie together with a theme.
Coaster Design Options:
- Geometric shapes—triangles, diamonds, whatever you like
- Nature themes: leaves, flowers, etc.
- Monogrammed sets for gifts
- Seasonal themes for swapping out through the year
Cheap kitchen utensils from the dollar store are awesome for practice. Wooden spoons and cooking sets are better for display than actual cooking, but they make for fun wall decor.
Build a shadow box or wall display for your burned utensils. Sort them by theme or pattern, and hang with little hooks or magnets to keep things tidy.
Show off finished coasters in a wooden stand or hang them as mini art. Their size makes them perfect for those awkward empty wall spots.
Incorporating Wood-Burned Accents in Room Decor
Scatter small wood-burned pieces around your home to tie everything together. Matching coasters in the kitchen and living room can create a nice sense of flow.
Room-Specific Applications:
- Kitchen: Recipe boxes, utensil holders, spice jar labels
- Living Room: Decorative bowls, picture frames, bookends
- Bedroom: Jewelry boxes, nightstand trays, wall hooks
- Bathroom: Soap dishes, towel hooks, storage bins
Layer different sizes of wood-burned items to keep things interesting. Pair a big serving tray with some smaller coasters and utensils on an open shelf.
Switch out wood-burned pieces for the seasons. Rotate in new coasters or signs for holidays or just when you’re feeling a change. Keep the off-season stuff in labeled boxes for easy swaps.
Color Coordination:
- Natural wood tones go well with farmhouse looks
- Dark burns stand out against light paint
- Light burns blend in with darker wood furniture
- Clear finishes keep the wood grain visible
FAQs
What are some simple wood-burning designs for beginners?
Start with the basics: straight lines, dots, circles. You’ll get a feel for the tool and how hot it gets without stressing over details.
Letter stamps help if you want neat, matching text. They’re great for making signs or personalizing frames without needing fancy skills.
Leaf shapes or simple nature outlines are good practice. Trace them first, then fill in with dots or crosshatch shading.
Borders on picture frames also make good practice. Try repeating waves, zigzags, or simple flowers.
Which wood-burning projects are the most profitable for selling?
Personalized cutting boards tend to sell well—people love custom monograms or family names. Round charcuterie boards with burned designs are especially trendy right now.
Kitchen utensils like wooden spoons and spatulas can bring in a nice profit. Buy them in bulk, add a cool pattern, and you’ve got a unique product.
Wedding and housewarming gifts are always in demand. Serving trays with “Cheers” or a special date make great gifts.
Holiday ornaments are another solid bet. Wood slices with burned sayings or simple designs sell like crazy around Christmas.
Could you suggest some creative wood-burning crafts for DIY enthusiasts?
Try mixing wood burning with watercolor painting for wall art that really stands out. Burn your design, then brush on watercolor for a layered look.
Growth charts are a fun family project. Burn measurement marks and cute designs onto a long board that moves with you from house to house.
Make wall clocks with scenic designs. Burn a landscape or nature scene right onto the clock face for a one-of-a-kind piece.
Tree trunk-style vases with carved initials make sweet, romantic decorations. Burn a heart and initials to mimic old-school tree carvings.
What are some compact wood-burning project ideas for limited spaces?
Wood slice magnets with leaf designs barely need any room, and you can finish them on just about any table. They're easy to tuck away when you're done.
Cork trivets don't ask for much heat and fit right into small spaces. They lie flat in a drawer and honestly, people appreciate them as gifts.
Letter tiles for mantles or shelves use up tiny scraps of wood. It's simple to work on just one at a time, so your workspace doesn't get out of control.
Coasters with quilt block patterns? You can get creative with the designs, and they don't take up much room at all. Just stack them up when you're finished.
How can I safely introduce wood burning to kids and ensure it's a fun experience?
Keep a close eye on kids and stick with low-temperature settings. I usually start with soft woods like pine since they burn easily without cranking up the heat.
Let them try out the tool on scrap wood first. Hand over simple ideas—maybe their initials or just some basic shapes—to help them get the hang of it.
Stencils can really help kids make cleaner designs. It saves them from getting frustrated and lets them see something cool come together pretty fast.
Make sure there’s plenty of light and fresh air where you’re working. Show kids how to hold the tool safely, and remind them to put it back on the stand whenever they’re not using it.
Pick out projects that fit their age, like wooden spoons with simple patterns. It’s nice when they can actually use what they’ve made and feel a bit proud of it.