

Table of Contents
Our Supporting Artisans who helped curate the products on this site will share commissions for purchases made through links in this post.Embroidery and cross-stitching have this way of blending creativity and relaxation that keeps people coming back, generation after generation. With just some thread, a needle, and a bit of patience, you can turn basic fabric into something genuinely beautiful. Both embroidery and cross-stitch are approachable for beginners—no need for fancy tools—and they offer tons of room for personal style and skill growth.
So, what sets these two apart? Cross-stitch sticks to X-shaped stitches on counted fabric, making pixel-style designs. Embroidery, though, is this whole world of stitches and techniques, and you can use just about any fabric you want. The tools overlap a lot, so you can dip your toes into both or even mash them together in one project if you feel like experimenting.
This guide’s here to help you get started with everything you need to know. We’ll cover the basic supplies, walk through essential techniques, and hopefully give you enough confidence to try your first project. Whether you’re aiming for a simple sampler or dreaming about something more intricate, knowing these basics will really help.
Key Takeaways
- Cross-stitch and embroidery don’t require much to get going—just some needles, thread, and fabric
- Learning the basic stitches and techniques lays the groundwork for tackling bigger, more detailed projects later
- Understanding your materials and prepping well saves you from a lot of beginner headaches
Understanding Embroidery and Cross-Stitching
Embroidery and cross-stitching both use thread to decorate fabric, but they work differently. Cross-stitch follows a grid, using only X-shaped stitches, while embroidery runs wild with all sorts of stitches and isn’t tied to a grid at all.
Key Differences Between Embroidery and Cross-Stitching
In cross-stitch, you stick to X-shaped stitches on gridded fabric like Aida cloth, following a pattern that tells you where each stitch goes.
Embroidery lets you pick from tons of stitch types—satin, backstitch, French knots, you name it—and you aren’t stuck with just one kind of fabric or a grid.
Fabric Requirements:
- Cross-stitch needs even-weave fabrics with clear holes
- Embroidery works on cotton, linen, silk, or honestly, almost anything
Design Structure:
- Cross-stitch gives you those crisp, pixel-like images
- Embroidery delivers more flowing, textured designs
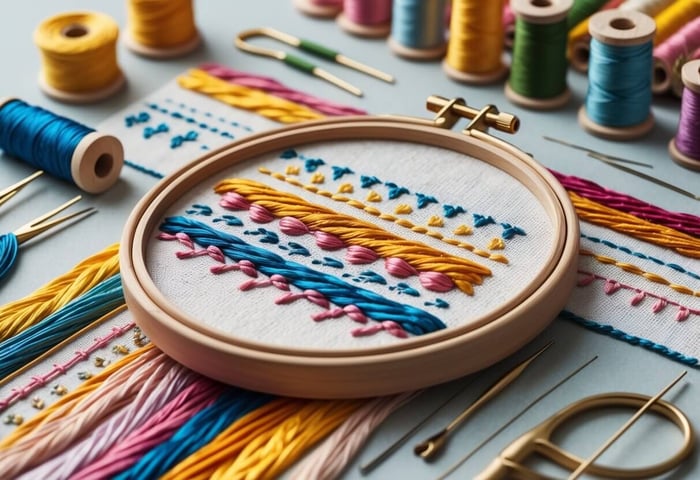
Both crafts use embroidery floss as their main thread. Cross-stitch usually sticks with full strands, but embroidery might split them up for different effects.
Tools and Materials:
- Cross-stitch uses blunt needles and gridded fabric
- Embroidery relies on sharp needles and hoops to keep fabric tight
Brief History and Cultural Significance
Cross-stitching goes way back—think ancient Egypt—and the method hasn’t really changed much. In medieval times, young girls learned stitching skills and alphabets through samplers.
Different cultures in Europe put their own spin on cross-stitch. Scandinavians leaned into geometric designs, while Eastern Europeans liked bold colors and folk patterns.
Embroidery’s roots run even deeper, showing up in ancient China, India, and Persia. Each place developed its own techniques and meanings behind the designs.
During Victorian times in England, embroidery became a big deal. Women stitched up elaborate pieces to decorate homes and clothing.
Cultural Impact:
- Cross-stitch samplers kept family histories alive
- Embroidery often signaled social status and creativity
- Both crafts helped pass down stories and traditions
These days, people all over the world are rediscovering these crafts, thanks in part to social media and online communities that make sharing patterns and tips easy.
Popular Uses and Project Types
Cross-stitch shines with structured designs and clear patterns. Think wall art, pillows, bookmarks, and framed pieces where you want sharp, detailed images.
Common Cross-Stitch Projects:
- Samplers with sayings or family names
- Holiday ornaments
- Baby bibs and birth announcements
- Kitchen towels with fun borders
Embroidery is more of a chameleon—use it to personalize clothes, whip up art, or jazz up home goods.
Popular Embroidery Applications:
- Monograms and embellishments on clothing
- Decorative pillows and wall hangings
- Table linens and napkins
- Jewelry and accessories
Both crafts work for all skill levels. Cross-stitch gives beginners a clear path, while embroidery lets experienced stitchers get creative and try new things.
People are mixing things up with modern, mixed-media designs and combining both techniques in one project for extra texture and interest.
Essential Tools and Materials
Having decent supplies really does make embroidery and cross-stitching more fun and less frustrating. Good needles, threads, and fabric help you make neat stitches and results that actually look finished.
Selecting Needles and Threads
Embroidery needles come in a bunch of sizes and types. For cross-stitch, tapestry needles are perfect because their blunt tips and big eyes glide right through fabric holes without splitting threads.
Stick with size 24-26 needles for most cross-stitch on Aida cloth. Size 24 suits 14-count fabric, while 26 is better for finer 18-count stuff.
Embroidery floss is the go-to thread. It’s made of six strands you can pull apart. For cross-stitching on 14-count fabric, use two strands. For backstitching, just one strand is enough.
Cotton floss is bright and holds color well. DMC and Anchor are solid brands with tons of shades. I like storing floss on bobbins or cards—it really helps with tangles.
Metallic threads add some sparkle, but be gentle—they fray if you use long pieces. Silk and other specialty threads can give you different looks if you want to experiment.
Choosing the Right Fabric
Aida cloth is a beginner’s best friend. The holes are obvious, so counting stitches is a breeze. It comes in different counts—14-count means 14 stitches per inch.
Start with 14-count Aida in white or cream. It’s easy on the eyes and works for most patterns. The holes are big enough for beginners but still allow for detail.
Linen fabric looks fancier and feels softer than Aida. It doesn’t have clear holes, so you need to pay attention and count threads carefully.
On linen, work your cross-stitches over two threads to get the same stitch size as 14-count Aida. Linen’s natural shades—cream, gray—are lovely for classic designs.
Pick fabric at least 3 inches bigger than your design on every side. That extra space comes in handy when you’re framing or finishing.
Using Hoops and Frames
Embroidery hoops keep your fabric snug while you stitch. There’s an inner ring and an outer ring with a screw for tightening.
For most projects, a 4-6 inch hoop works well. Wooden hoops grip better than plastic, but metal ones last longer (if you don’t mind the price).
Lay your fabric over the inner ring, then snap the outer ring on and tighten the screw until the fabric feels tight—almost like a drum, but don’t overdo it.
Move your hoop as you work. Don’t leave your fabric in the hoop when you’re not stitching, or you’ll get stubborn ring marks.
Scroll frames are great for bigger projects. They hold your fabric flat and don’t squish finished stitches. Just roll the fabric onto the wooden bars at the top and bottom.
Getting Started: Preparing for Your First Project
Getting ready before you dive in can really save you from headaches later. Gather your supplies, prep your fabric, and get familiar with your pattern before you start stitching.
Gathering and Organizing Supplies
Round up your basics first: fabric, floss or thread, needles, and a good pair of scissors.
For cross-stitch, 14-count Aida cloth is a safe bet. It’s cotton, easy to work with, and the holes are obvious—perfect for starting out. Fourteen stitches per inch is pretty standard.
Pick up a size 24 tapestry needle for that fabric. The blunt tip slips right into the holes without snagging any threads.
Get some 6-strand cotton embroidery floss in the colors your pattern asks for. DMC and Anchor are reliable and don’t fade.
Sharp, small embroidery scissors are a must—you want clean cuts when you’re working with delicate threads.
An embroidery hoop (about 4-6 inches) will help keep everything tight while you’re stitching.
Honestly, a small basket or container is all you need to keep things organized. Sort your threads and keep scissors handy so you don’t lose them mid-project.
Setting Up Your Fabric
Wash your hands before touching fabric—oils can leave annoying stains. Cut your Aida cloth so it’s 2-3 inches bigger than your finished design on every side.
Fold your fabric in half both ways to find the center, and mark it lightly with a pencil or removable marker.
To keep edges from fraying, sew a zigzag stitch with your machine or fold and hand-stitch the edges down.
Pop your fabric in the hoop, centering the area you’ll work on. Tighten it so the fabric is taut but not stretched out.
You want the fabric firm in the hoop—not floppy, but don’t pull so hard it warps. That balance really matters for neat stitches.
Transferring and Reading Cross-Stitch Charts
Cross-stitch charts use symbols for each color. Each symbol lines up with one stitch on your Aida cloth.
Take a few minutes to study your chart before starting. Find the color key and check that your design will fit your fabric.
Start in the center of your design so it sits nicely on your fabric with enough space around it.
Each square on your chart means one cross-stitch on the fabric. Double-check your counting from the center so you don’t end up off by a row or two.
Some charts throw in partial stitches or extra symbols, but for your first project, stick to the full cross-stitches and ignore the tricky stuff.
Mark off finished sections on your chart as you go. It’s easy to lose your place otherwise, and nobody likes picking out stitches because of a simple mistake.
Mastering Basic and Advanced Stitches
Getting your stitches just right takes some practice—steady hands, even tension, and paying attention to where you place your thread. The classic full cross-stitch is where most people start, but mixing in things like half-stitches can give your work more texture and speed things up.
Full Cross Stitch Technique
The full cross stitch forms the backbone of your design. Bring your needle up through the bottom left hole of your fabric square and pull the thread all the way through.
Push the needle down through the top right hole. That’s your first diagonal. Try not to yank too hard—just keep it even.
Complete the Cross:
- Bring the needle up through the bottom right hole
- Go down through the top left hole
- There’s your “X”
Work all the bottom diagonals across your row first, then come back for the top diagonals. This helps your stitches line up neatly.
| Step | Action | Direction |
|---|---|---|
| 1 | First diagonal | Bottom left to top right |
| 2 | Second diagonal | Bottom right to top left |
Let all your crosses lean the same way. Make sure the top thread always goes in the same direction through your whole project.
Stick with three strands of floss for most 14-count fabric. For higher counts, drop to fewer strands so it doesn’t get bulky or lumpy.
Half Cross Stitch and Other Variations
Half cross stitch uses just one diagonal—no full X here. It’s great for backgrounds or where you want lighter coverage.
To make a half cross, go from bottom left to top right and call it done. Don’t bother with the return diagonal. This saves thread and speeds things up, especially on big areas like sky or water.
Three-Quarter Stitches:
- Start with a half cross
- Then add a tiny stitch from the center to a corner
- This helps smooth out curves in your design
Fractional Stitches:
- Quarter stitches fill in those tiny gaps
- Handy for detailed shading
- Poke right through the center of the square
Keep your half stitches all slanting the same way. Mixing them with full crosses adds nice depth and texture.
Try these variations for backgrounds or whenever you don’t need solid coverage.
Tips for Consistent and Neat Stitches
Start each thread with a waste knot or the loop method. Regular knots just make bumps on the back—nobody wants that.
Stick to thread lengths between 18 and 24 inches. Longer ones just tangle and fray, but super short ones mean you’ll be starting over too often.
Tension Control:
- Pull the thread snug, not tight
- Keep the fabric flat—no puckering
- Consistent pressure makes your stitches look even
Work somewhere with good light. Straining to see the holes? That’s when mistakes sneak in.
Use a laying tool or your finger to keep multiple strands flat. Twisted threads just look messy.
When you finish a thread, weave it under four or five finished stitches on the back. Snip it close to the fabric.
Every now and then, hold your work at arm’s length. It’s the best way to spot uneven spots before you’ve stitched too much to fix it.
Step-by-Step Guide to Cross-Stitching
Cross-stitching is all about making X-shaped stitches on fabric with embroidery floss and a needle. If you want your work to look good, focus on centering, managing your thread, and keeping your tension steady.
How to Cross Stitch: From Start to Finish
Gather your basics: Aida fabric, embroidery floss, tapestry needle, scissors, and an embroidery hoop. For your first try, pick a simple pattern—no need to get fancy yet.
Read your pattern chart closely. Each colored square is one stitch. The symbols or colors show which floss to use.
Cut your floss to about 18 inches. Anything longer just gets knotted up and wastes thread.
Separate the floss strands. Most embroidery floss comes with six strands twisted together. Usually, you’ll use just one or two strands for cross stitch.
Thread your needle—skip the knot. You’ll secure the tail by stitching over it instead.
Work in rows from left to right if you can. Make all the half stitches (/) across, then come back with the second half (\) to finish the X’s.
Keep all your top stitches slanting the same way. That’s what makes the finished piece look crisp and tidy.
Centering and Starting Your Design
Fold your fabric in half both ways to find the center. Mark it with a small stitch or a pin.
Look for the center arrows on your pattern chart—they show where the middle of the design sits.
Start stitching close to the center of your design. That way, your finished work stays centered and you don’t run out of fabric on one side.
Pick a big block of solid color near the center to start. It’s so much easier than jumping into a spot with lots of color changes.
Count carefully from the center to your starting point. Double-check before you dive in with your first stitch.
If you want more stability, pop your fabric into an embroidery hoop. Pull it tight, but not so tight that it distorts the weave.
Securing Threads and Managing Tension
Skip knots in cross stitch. They just make lumps and can slip through the holes.
Start each new thread by leaving about a one-inch tail on the back. Hold that tail as you make your first few stitches to lock it in place.
Pull your stitches with steady, gentle pressure. Too tight and the fabric warps, too loose and everything looks sloppy.
End your thread by weaving it under three finished stitches on the back. That’ll hold it in place without a knot.
Let your needle and thread dangle now and then to let them untwist. Otherwise, the thread will get all curly.
Don’t jump long distances across the back. Long threads can show through on the front, especially with light fabrics.
Creative Touches and Project Completion
Finishing embroidery and cross-stitch is where you get to have some fun—add embellishments, decide how to display it, and give it some TLC. It’s these last steps that really turn your work into something special (and worth showing off, honestly).
Adding Embellishments and Finishing Techniques
Beads and sequins can bring some sparkle to your project. Stitch them on with a half cross-stitch and just one strand of floss.
French knots add texture—perfect for flower centers or a bit of dimension on leaves. Wrap the thread around your needle twice for small ones, three times for bigger knots.
Metallic threads look amazing but can be a pain. Use shorter pieces so they don’t tangle, and grab a bigger needle to keep them from fraying.
| Embellishment Type | Best Use | Attachment Method |
|---|---|---|
| Seed beads | Stars, flower centers | Half cross-stitch |
| Sequins | Water, decorative accents | Center stitch |
| Ribbon | Bows, flower petals | Couching stitch |
Backstitching gives your finished piece some definition. Do all your cross-stitches first, then go back and outline with one or two strands.
Try out dimensional elements like buttons or charms. Sew them on with sturdy thread and reinforce the back with interfacing if it feels flimsy.
Framing and Displaying Cross-Stitch Art
Professional mounting can really elevate your work. Stretch your fabric over acid-free board using stainless pins or lacing thread.
Leave about two inches of fabric around your stitched area for mounting. That extra bit helps keep everything secure, no pins showing.
Mat selection makes a big difference in how your piece looks. Pick colors that work with your stitching, but don’t let them overpower it. Usually, neutrals are a safe bet.
If you’ve got embellishments that stick out, you’ll need a deeper frame—shadow boxes work well for that. Flat pieces fit fine in standard frames.
UV-protective glass keeps your colors from fading. Museum glass is pricey but it cuts down glare and gives the best protection if you’re feeling fancy.
Don’t want to frame it? Try hoops, little easels, or fabric books for smaller projects. They’re budget-friendly and still look cute on display.
Care and Maintenance Tips
Gentle washing keeps your finished piece looking fresh. Hand wash in cool water with mild soap, rinse it well.
Don’t wring or twist the fabric. Press out extra water with clean towels and lay it flat to dry, out of direct sunlight.
Iron on the wrong side with medium heat and a pressing cloth between the iron and your stitches. That’ll protect the threads and any embellishments.
Store unframed pieces flat in acid-free boxes, with tissue paper between layers. Skip plastic bags—they trap moisture and can cause mildew.
Dust framed pieces with a soft brush or microfiber cloth. Once a year, check frames for loose corners or cracked glass that could mess up your work.
Keep your stitching away from sunlight, heat vents, and humid spots like bathrooms. That’s how you avoid fading and fabric damage.
FAQs
What are the basic materials needed for starting embroidery or cross-stitch?
You’ll need fabric, thread, needles, and scissors. For cross-stitch, grab some Aida cloth or evenweave and stranded cotton thread (DMC or Anchor are popular).
Embroidery usually uses regular cotton fabric and a mix of threads. An embroidery hoop keeps your fabric tight while you stitch.
Tapestry needles are best for cross-stitch—they’ve got blunt tips. Embroidery needles are sharper for piercing plain fabric.
Small, sharp scissors are a must for trimming thread. Use fabric scissors to prep your cloth before you start.
How does one transfer a design onto the fabric for embroidery or cross-stitch?
For cross-stitch, you use a counted pattern on blank fabric. Count the chart squares and match them to your fabric holes.
Find your fabric’s center by folding it in half both ways. Mark it with a pin or a tiny stitch.
For embroidery, you can trace patterns with transfer paper or water-soluble markers. Iron-on transfers or printable fabric sheets work too. If the fabric’s thin, a light box helps you trace.
What are the different types of stitches used in embroidery and cross-stitch, and when should each be used?
Cross-stitch sticks to the basic X. You’ll also need backstitch for outlines and French knots for texture.
Make each cross the same way for neatness—bottom thread first, then the top.
Embroidery opens up a bunch of stitches: chain, satin, running, and more. Chain stitch is great for outlines and filling shapes.
Satin stitch fills in solid shapes smoothly. Running stitch makes simple lines and borders.
Use backstitch in both crafts for crisp outlines. French knots add those tiny textured dots.
Can you describe the process of starting and finishing a thread in embroidery or cross-stitch?
Skip tying knots at the ends of your thread. Instead, leave a short tail on the back side of your fabric and catch it with your first few stitches—that usually does the trick.
Some folks like the waste knot method. Tie a knot, bring your needle up from the front a few inches away from where you want to begin, and start stitching toward the knot.
As you work your way over, your stitches will trap the thread tail underneath. When you reach the knot, just snip it off.
When you need to finish off, weave your thread under a few nearby stitches on the back. That holds everything in place and keeps your work looking tidy—no lumpy knots in sight.
How can one avoid common mistakes while learning embroidery or cross-stitch?
Careful counting makes a big difference in cross-stitch. If you lose your place, try using a highlighter to mark off finished sections on your pattern.
Stick to thread lengths of about 18 inches. Anything longer seems to tangle up way too easily, and shorter lengths just mean more threading—who has time for that?
Keep your cross stitches all slanting the same direction. That little detail makes the whole project look more polished.
Watch your tension—if you pull too tightly, the fabric puckers and the stitches look off. Aim for flat, relaxed stitches that just sit nicely against the cloth.
And don’t forget to check your progress against the pattern as you go. Catching mistakes early saves a lot of frustration down the line.
What is the best way to care for and preserve finished embroidery or cross-stitch work?
Go ahead and wash your finished piece in cool water with a gentle soap if it really needs it. Just double-check that your threads won't bleed before you start.
When it's dry, press the fabric face-down on a towel—this way, you won't squash the stitches. Stick to a warm iron, not blazing hot.
Frame your work using acid-free materials, since regular stuff can cause yellowing down the line. If you can, use UV-protective glass so your colors don't fade so quickly.
If you haven't framed it, store your piece flat in acid-free boxes or folders. Folding it usually leaves creases that never quite come out.
Try to keep finished pieces out of sunlight and away from damp spots. Clean, dry storage really helps your work last for years—maybe even generations, if you're lucky.
Craftwiz 4 Set Embroidery Starter Kit, Embroidery Kit for Beginners Adults and Kids with Patterns, Beginner Embroidery Kit for Adults, Hand

$19.99
$27.99
Brand: CraftwizColor: multicoloredFeatures: 🧵 Craftwiz Embroidery Kit for Beginners - Ultimate Embroidery Set for Beginners - Thoughtfully crafted for embroidery novices, this kit includes everything to begin your embroidery journey: Bamboo Hoop ((7.8 in), 4 Pre-Printed Cotton Cloths (12x12in), Plenty… read more