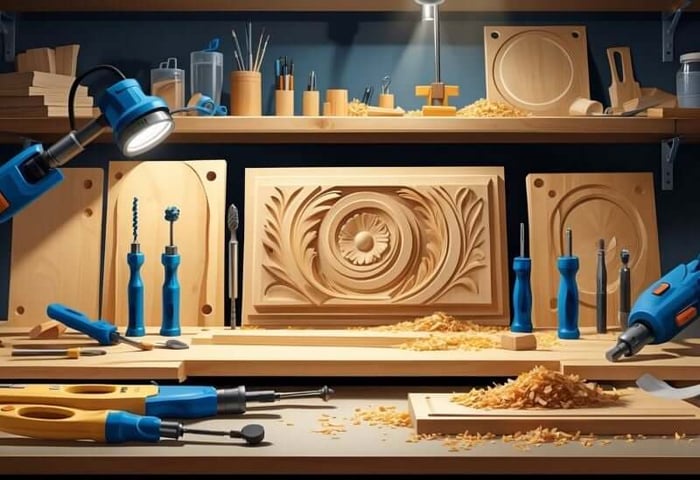

Table of Contents
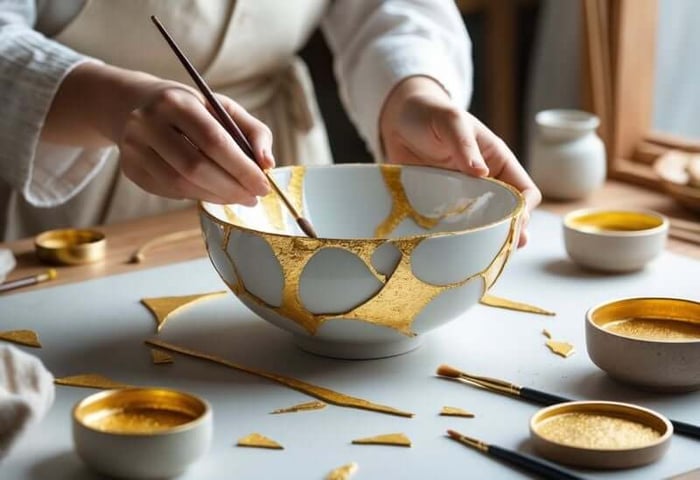
Our Supporting Artisans who helped curate the products on this site will share commissions for purchases made through links in this post.Breaking a favorite mug or treasured ceramic piece doesn't have to mean tossing it out. Kintsugi, the ancient Japanese art of repairing broken ceramics with gold, turns damaged pottery into gorgeous art that celebrates imperfection. These days, you can try this technique at home using easy-to-find materials like epoxy resin and gold powder.

You can learn kintsugi at home using gold epoxy resin to create striking repairs that show off the cracks with metallic lines instead of hiding them. The process calls for basic supplies you can grab online or at craft shops, making this centuries-old art surprisingly accessible. Unlike traditional methods that use special lacquers, modern kintsugi techniques with epoxy resin offer a more practical entry point for beginners.
This guide covers everything from the philosophy behind kintsugi to gathering supplies, making repairs, and showing off your finished work. You'll see how to turn accidents into art, pick up some useful techniques, and get a few safety and troubleshooting tips along the way.
Key Takeaways
- Kintsugi turns broken ceramics into art by highlighting cracks with gold epoxy resin instead of hiding damage
- You just need basics like broken pottery, epoxy resin, gold powder, and a few simple tools to try kintsugi at home
- The process includes cleaning, applying gold-mixed epoxy, joining pieces, and finishing with some polishing
What Is Home Kintsugi?
Home kintsugi lets DIYers adapt the ancient Japanese art of golden repair using accessible materials like epoxy resin instead of urushi lacquer. This way, you can highlight ceramic breaks with metallic lines right at your own kitchen table.
Origins and History of Kintsugi
Kintsugi appeared in Japan around the 15th century, when artisans came up with a new way to fix ceramics. The Japanese art translates to "golden joinery" and completely flips the script: instead of hiding damage, it puts it front and center.
The practice grew out of a Japanese philosophy that finds beauty in imperfection and impermanence. Traditional craftsmen used urushi lacquer mixed with precious metal powders to create gorgeous golden seams along the cracks.
This technique ties deeply to wabi-sabi principles. Instead of throwing away broken pottery, artisans turned flawed pieces into objects even more valuable than before.
As kintsugi spread across Japan, it became both practical and artistic. Every repaired piece told its own story through those golden scars.
Kintsugi Versus Traditional Repairs
Traditional ceramic repairs usually aim to make breaks invisible by matching glazes or using hidden adhesives. Kintsugi does the opposite—it makes cracks the star of the show.
Standard methods focus on restoring the original look. Most people use clear glues or color-matched fillers that blend right in.
Kintsugi lets the break become part of the object's story. The gold lines add visual interest and a layer of meaning to your ceramics.
Traditional repairs put function first. Kintsugi tries to balance function and form, bringing out new beauty from damage.
This contrast shows how different cultures handle imperfection and aging. Western repair traditions often want everything to look "like new" again.
The Role of Gold Epoxy Resin
Modern home kintsugi swaps out urushi lacquer for epoxy resin mixed with metallic powders. That change makes the art way more approachable—you don't need rare Japanese supplies to get started.
Epoxy resin has some real perks for home repairs. It cures faster than urushi and doesn't require any special storage or tricky application.
Mixing gold, silver, or platinum powder right into the epoxy gives you tough, metallic seams that really pop against cracks.
The resin bonds strongly and can stand up to everyday use. Epoxy-based repairs create permanent joins that work well for functional items.
Gold powder usually gives the boldest effect with most ceramics, but silver and platinum can look great too, depending on your style.
Philosophy and Meaning Behind Kintsugi
Kintsugi turns broken pottery into beautiful art by highlighting cracks with gold instead of hiding them. This Japanese practice nudges you to see beauty in imperfection and appreciate the story behind each chip or break.
Celebrating Broken Ceramics
Kintsugi celebrates an object's history rather than covering up its flaws. When you fix a ceramic piece with this method, you create gold lines that record what happened.
The cracks become the most eye-catching part of the piece. You don't try to hide the repair or act like nothing broke.
This philosophy treats damage as beautiful, not shameful. A repaired ceramic can actually feel more meaningful than it did before.
Key ideas behind celebrating breaks:
- Breaks add character and uniqueness
- Each crack has its own story
- Gold highlights make fractures shine
- Repaired pieces become one-of-a-kind art
The gold veins form patterns you could never plan. Your ceramic gets a new life through its scars.
iienjoy Kintsugi Repair Kit, 4 Colors Food Safe Kintsugi Kit Repairs Broken Ceramics, Jade, Glass, Meaningful Pottery, Kintsugi Gold Glue for Ceramics and Porcelain Repair Perfect for Beginners

$29.99
Brand: iienjoyColor: Gold &SilverFeatures: Modern Kintsugi: Kintsugi kit turns broken ceramics, glass, wood, and more into stunning pieces of meaningful art. Celebrate imperfections and give beloved items a second life. Eco-Friendly Kintsugi Kit: Includes everything you need - 50ml food-safe… read more
Wabi-Sabi and Acceptance of Imperfection
Wabi-sabi sits at the heart of kintsugi philosophy. This Japanese idea teaches you to find beauty in things that are imperfect, temporary, and incomplete.
Kintsugi's philosophy is all about celebrating imperfections and scars. You learn to see flaws as features, not problems.
Wabi-sabi reminds us that nothing stays perfect. Everything ages, changes, sometimes breaks—and that's okay.
Wabi-sabi principles in kintsugi:
- Imperfection creates unique beauty
- Impermanence makes moments precious
- Incompleteness leaves room for growth
- Natural aging adds character
When you practice kintsugi, you accept that your ceramics will show their repairs. The gold doesn't match the original material or try to disappear.
Kintsugi as a Form of Artistic Expression
Kintsugi turns fragility into a show of resilience through artistic repair. You get to create new patterns and designs that didn't exist before the break.
The gold lines become abstract art across your piece. Each repair leads to different, unpredictable patterns based on how the ceramic broke.
Artistic choices you can make:
- Metal choice: Gold, silver, or copper powder
- Line thickness: Go for delicate lines or bold statements
- Pattern emphasis: Highlight certain cracks more
- Color contrast: Dark ceramics make gold lines pop
Kintsugi highlights cracks to create pieces that sometimes outshine the original. You become an artist who works with accidents, turning them into intentional beauty.
Your repaired ceramics become conversation starters that mix traditional Japanese art with your own style. The gold veins flow across the surface like rivers of light.
Materials Needed for Gold Epoxy Resin Kintsugi
Having the right materials can mean the difference between a beautiful repair and a sticky mess. You'll want quality epoxy resin, metallic powder, and some basic safety gear to get those golden seams just right.
Gold Epoxy Resin and Alternatives
Clear epoxy resin gives you a solid base for kintsugi. Two-part epoxy systems are best—they cure hard and bond tightly to ceramics.
Look for epoxy that offers:
- Plenty of working time (15-30 minutes is good)
- A clear finish once it sets
- Low shrinkage
- Room temperature curing
Food-safe options are out there if you want to fix dishes or cups. Bio-based epoxy resins offer BPA-free formulas that can survive the dishwasher.
Traditional urushi lacquer is still an option if you want to go old-school. It takes longer to cure and costs more, and you'll need to handle it with care.
Skip super glue or craft glue—they don't mix well with metallic powders and won't give you a strong repair.
Metallic Pigment Powder for Epoxy Resin, Copper/Silver/Gold Metallic Powder and Black/Pearl White Mica Powder, Fine Real Mica Metal Dye for Kintsugi,

$11.77
$12.49
5 Classic Metallic Fine Glitter Pigments: Our metallic powder set featuring rose gold mica powder, antique gold mica powder, rustic gold mica powder, copper mica powder, and silver mica powder. All of the pigment colors are the most common and… read more
Mica Powder Choices
Gold mica powder gives kintsugi repairs that iconic metallic shimmer. Just mix the powder right into your epoxy before you start patching up cracks.
People gravitate toward these metallic shades:
- Bright gold - That classic kintsugi vibe
- Antique gold - A bit warmer, almost vintage
- Silver - Feels modern and fresh
- Copper - Deep reddish glow
Begin with a little powder; you can always add more if the color isn’t bold enough. Overdoing it, though, can mess with how well the epoxy holds.
Pearl Ex and Jacquard consistently deliver good results, in my experience. Skip glitter or craft powders with chunky flakes—they just don’t work the same.
Some kintsugi repair kits come with pre-measured powder, which is actually pretty handy if you want predictable color, especially when you’re starting out.
Selecting and Preparing Broken Ceramics
Pick your ceramics with care for those first tries. Glazed, smooth pottery is way easier to work with than rough or porous stuff. If you see hairline cracks, skip it—they tend to spread and ruin your work.
Safe bets:
- Porcelain bowls and plates
- Glazed mugs
- Ceramic decor pieces
- Stoneware
Clean up the broken edges before you do anything else. Wipe away dust, grease, or any old glue using rubbing alcohol, then let everything dry out.
Test fit all the pieces before mixing epoxy. If there are big gaps, you’ll need a different approach than with tight cracks. Some broken ceramics benefit from partial assembly to check alignment.
Don’t use repaired ceramics for food unless you’re using food-safe materials. Most epoxies are toxic and should never touch anything edible.
Keep the broken bits in a padded box. Sharp edges can slice fingers or chip further if you’re not careful.
Step-by-Step Guide to Home Kintsugi Repair
To pull off a good repair, you’ll need to prep your broken ceramics, mix up epoxy and metallic powder, and then reassemble everything with a steady hand. Every step matters if you want a strong, beautiful result.
Arranging and Cleaning the Ceramic Pieces
Gather all your broken pieces on a flat table. Lay them out in the order they’ll go back together—it helps you figure out the puzzle before you start gluing.
Give each piece a good wash with warm water and mild soap. Scrub off any dirt or oils from the edges. Dry them with a clean cloth so there’s no moisture left.
Look for tiny chips or fragments. Hang onto these; you might need them to fill small gaps. Smooth rough edges with a bit of fine sandpaper if needed.
Wear gloves—seriously, those edges are sharp. Handle each piece gently to avoid more breaks or cuts.
Do a dry run by fitting the pieces together before using any glue. It’ll give you a heads-up on tricky spots and help you work faster once you start mixing epoxy.
Mixing and Applying Epoxy Resin
Pick a two-part epoxy meant for ceramics. These give you the strongest hold. Mix the resin and hardener in equal parts, following the directions on the package.
Stir in your gold powder while the epoxy is still workable. Start small—you can always add more if needed. Mix well so the color spreads evenly.
Once you start mixing, move quickly. Most epoxies give you about 10-15 minutes before they start to set. Only make as much as you can actually use in that window.
Spread the gold epoxy on the broken edges with a tiny brush or a wooden stick. Apply adhesive in a thin, even layer—too much will ooze out and look messy.
Focus on one joint at a time. It’s just easier to control the process that way.
Joining and Holding Pieces Together
Press the ceramic pieces together—firm but gentle. A little epoxy should squeeze out along the crack, creating those gold veins everyone loves.
Hold each joint steady for 30-60 seconds to let the initial bond take. Use tape, clamps, or just your hands if that’s all you have. Try not to move the pieces during this stage.
Wipe away extra epoxy right away with a damp cloth or cotton swab. Once it hardens, cleaning up is a pain. Be careful not to smudge the gold seam.
Let each joint cure according to your epoxy’s instructions. Most need a full day to reach max strength. Keep your project somewhere safe and out of the way.
Make sure everything lines up before the epoxy sets. You get a few minutes to tweak things, but if you need big changes, you’ll have to start over with fresh glue.
Finishing Touches and Displaying Your Work
The last steps are where your repaired ceramic really starts to shine—literally. Careful gold application, a bit of finishing, and some thought about how you’ll display your piece all make a difference.
MEYSPRING Royal Gold Mica Powder for Epoxy Resin, Kintsugi Gold - Epoxy Resin Pigment - Resin Color for Kintsugi Repair Kit & Metallic Epoxy, Resin

$14.99
Brand: MEYSPRINGColor: Royal GoldFeatures: ELEVATE YOUR RESIN CREATIONS WITH ROYAL GOLD MICA POWDER: Our MEYSPRING Royal Gold pigment, ranging from 10-60 microns, blends with epoxy and UV resin, adding a dazzling touch to your resin art and crafts projects without… read more
Applying Gold Accents with Mica Powder
Mix your mica powder with epoxy in small batches so it doesn’t harden before you’re ready. A ratio of about 1 part mica to 3 parts epoxy usually gives good shine and coverage.
Brush the mixture along the cracks with a small brush or stick. You’ve got maybe a minute or so before it gets too thick to spread, so work fast.
Tips for Application:
- Keep the room above 70°F—epoxy mixes easier
- Go for thin, even coats to avoid clumps
- Wipe off any extra right away with a damp cloth
Press the gold mixture into every crack and gap. You want full coverage and no air bubbles lurking underneath.
Drying, Polishing, and Sealing
Let your piece cure for at least 12 hours if it’s around 75°F or warmer. If it’s cooler, it might take a couple of days to harden fully.
Once it’s set, use fine sandpaper (400-600 grit) to smooth out any rough spots. Go gently and use circular motions so you don’t scratch the gold.
How to Polish:
- Wipe with 91% alcohol to get rid of dust
- Buff gently with a soft cloth
- Use small circles as you buff
- Check that everything’s even
Seal the repair with a clear coat if you plan to handle the item a lot. If it’s just for display, you can skip this, but for anything functional, it’s a good idea.
Best Practices for Display and Care
Pick a stable spot away from direct sunlight—otherwise, the metallic finish might fade. Also, avoid places with big temperature swings or lots of humidity.
Support your piece with felt pads or a display stand. If it’s heavy, add extra support at the repair points.
Display Tips:
- LED lights keep things cool
- Try to keep the room temperature steady
- Don’t put it near busy walkways
- Glass cases work well for valuable items
Clean your finished piece with a soft, dry cloth. Water, chemicals, or anything abrasive can damage the gold. Handle it as little as possible to keep those accents looking fresh.
Tips, Safety, and Troubleshooting

You’ll need to pay close attention to detail and keep safety in mind. Sharp edges and chemical adhesives aren’t forgiving if you get careless.
Important Safety Precautions
Don’t touch broken ceramic edges with bare hands. They’re way sharper than you’d expect. Always grab pieces by the unbroken parts.
Wear eye protection if you’re breaking ceramics on purpose for practice. Wrap them in towels and tap gently with a hammer—no need to smash things aggressively.
Work somewhere with good airflow when using epoxy. The fumes can be nasty if you’re in a closed room. Open a window or work outside if you can.
Keep nitrile gloves handy to avoid fingerprints on your repairs. Latex works in a pinch but can tear more easily.
Epoxy sticks to skin for good. If you get it on your fingers, wash up right away with soap and warm water. Don’t peel off dried epoxy—it’s not worth it.
Store all supplies out of reach of kids and pets. Never eat or inhale mica powder or epoxy.
Advice for Beginners
Start with practice pieces you don’t care about. Use cheap ceramics until you get the hang of it.
Pick items with a few large breaks—way easier than dealing with a jigsaw puzzle of tiny shards.
Try a complete kintsugi kit if you don’t want to hunt down all the supplies. It just makes things simpler.
Practice mixing epoxy and mica before you work on your real piece. Get used to the texture and color you want.
Take your time. If you rush, you’ll make mistakes, and epoxy doesn’t forgive.
Don’t stress over imperfections—they’re part of the charm. The whole point of kintsugi is to highlight flaws, not hide them.
Set up your workspace with good lighting and everything within reach. You won’t want to stop and search for tools once you’ve mixed your epoxy.

FAQs
What materials are included in a typical Kintsugi repair kit?
Most kintsugi repair kits include epoxy resin and metal powder for that signature finish. You’ll get gold, silver, or platinum powder depending on which kit you pick up.
They tend to throw in mixing tools too—little bowls, sticks, and brushes for spreading the adhesive and powder mix.
Some kits swap out epoxy for traditional urushi lacquer, though epoxy resin is a more accessible alternative if you’re just fixing things up at home.
How do I prepare broken ceramic pieces for Kintsugi repair?
Clean all the broken pieces really well before you start. Get rid of dust or any grime along the cracks.
Lay out the shards on your table to see how they fit back together. Planning out the order makes things way less stressful once you’ve got sticky epoxy in play.
Have all your materials set out and a clear surface to work on. Staying organized helps you avoid mixing up the pieces mid-repair.
Can traditional kintsugi be practiced with modern gold epoxy resin?
Traditionally, kintsugi uses urushi lacquer with gold powder, but these days, people often use epoxy resin since it’s easier to handle at home.
About half of professional kintsugi repairs use 23.5 karat gold with lacquer, while the rest use gold effect blends from brass, copper, or zinc.
Epoxy resin bonds really well and holds up for functional ceramics. The look is surprisingly close to the old-school method, and honestly, it’s a lot less intimidating for beginners.
What are the steps involved in repairing a ceramic using the kintsugi method?
First, mix your epoxy resin as the kit suggests. Slowly add the metal powder until you like the color and texture.
Use a brush or mixing stick to dab the mixture along the cracks. Fit the pieces together and press them firmly for as long as the instructions say.
Be careful when using the epoxy because it can become sticky. You’ll want to work fast but don’t rush—clean lines look much better than a messy fix.
Wipe away any extra adhesive with a damp cloth right away. Let the repair cure fully before touching or moving the piece.
Common Mistakes and How to Avoid Them
People often rush the drying time between pieces. Let each section cure for 12-24 hours before moving on to the next.
Mixing a big batch of epoxy just wastes material. It starts hardening after five or ten minutes, so only make what you’ll use right away.
Poor planning with your pieces can really mess things up. Always arrange and test fit before you start gluing anything.
Too much mica powder muddies the look. Start with a pinch, then add more if you need a brighter gold.
Leaving extra epoxy on the surface will ruin the final look. Scrape off excess with a razor blade while it’s still soft.
If your item broke into tons of tiny pieces, it’s probably not worth trying to fix it with this method. Keep it simple for the best results.
How long does it take for a kintsugi repair to fully cure?
Usually, epoxy resins need about 24 to 48 hours to set completely. You’ll notice it starts firming up within the first 10 to 30 minutes.
Temperature and humidity can mess with the timing. If it’s warmer, things move faster; if it’s chilly, expect to wait longer.
Don’t move or use your repaired ceramic until it’s totally cured. If you handle it too soon, the bond might not hold up as well as you’d hope.
What are the long-term care instructions for ceramics repaired with kintsugi techniques?
Try to handle kintsugi-repaired ceramics with care so the gold lines stay intact. If you can, keep from dropping or bumping those repaired spots against anything hard.
Wash them gently using mild soap and warm water, then wipe with a soft cloth. Steer clear of abrasive cleaners or rough scrubbing, since that can scratch up the metal powder finish.
Find a safe spot to store your repaired pieces, somewhere away from rapid temperature changes. Those quick shifts in temperature? They can make the repair lines flex and possibly weaken over time.