
Table of Contents
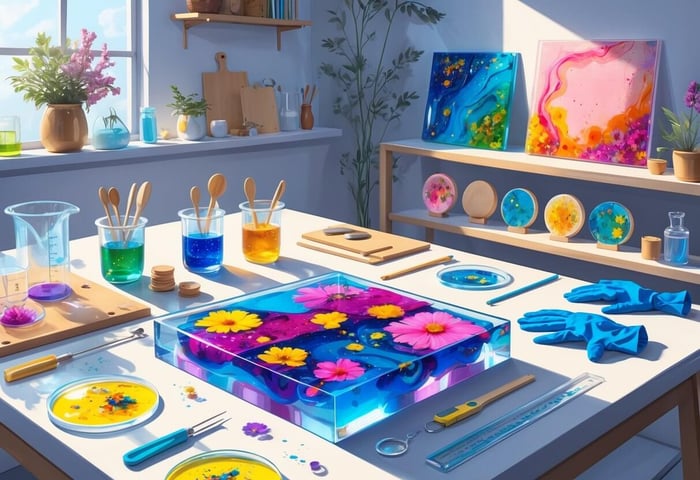
Our Supporting Artisans who helped curate the products on this site will share commissions for purchases made through links in this post.Epoxy resin art opens up a world of creative possibilities—think vivid paintings, handmade jewelry, decorative tiles, and even wooden masterpieces. This stuff is wild: blend liquid resin with a hardener, and you get durable, glossy artwork that catches the light in a way that’s hard to beat. Whether you love bold abstract designs or want to make something functional like coasters or tables, epoxy resin lets you create pieces that really pop.
Diving into epoxy resin art means you’ve got to get the hang of the materials, techniques, and safety basics if you want results you’ll actually want to show off. You’ll need to nail the mixing ratios, keep an eye on your timing, and experiment with different application methods until you get the look you’re after. Prep, patience, and a willingness to mess up a few times—those are your best friends here.
This guide covers everything from picking your first resin kit to trickier moves like creating cells and multi-layered effects. You’ll get tips on choosing tools, working safely, and fixing the little disasters that everyone runs into at first. Hopefully, you’ll finish reading ready to jump in and start making your own resin art—maybe with a bit less hesitation.
Key Takeaways
- Epoxy resin art blends liquid resin and hardener to create tough, glossy pieces that work for total beginners or seasoned artists
- Picking the right materials, using safety gear, and learning mixing/pouring basics are all crucial for good results
- You can make anything from abstract paintings and jewelry to coasters and fancy wooden decor
Understanding Epoxy Resin Arts
Epoxy resin arts start with mixing two chemicals to form durable artwork with a super glossy finish. You have to figure out how resin and hardener react together to form that tough plastic feel.
Defining Epoxy Resin Arts
Epoxy resin art is all about mixing liquid resin with a hardener and turning it into paintings or decorative objects. The mix starts off runny, so you can pour, swirl, and shape it before it hardens into a clear, glassy surface.
People add colors with alcohol inks or mica powders for different effects. The resin flows and blends over canvas, wood, tiles—you name it.
You can make abstract paintings, coasters, jewelry, or even furniture. No two pieces ever turn out the same, which is honestly half the fun.
Some common epoxy resin art projects:
- Pour paintings on canvas
- Decorative coasters
- Jewelry pieces
- Table tops
- Wall art
When you finish, the art has a smooth, shiny surface that looks a bit like glass. These pieces can last for years, and the colors usually stay bright.
Key Characteristics of Epoxy Resin
Epoxy resin cures into a hard, clear finish. Once it’s set, it’s tough—resistant to scratches, water, and chemicals. If you mix it right, the clarity is impressive.
Physical properties of cured epoxy resin:
- Hardness: It resists scratches pretty well
- Clarity: Super clear if you mix it properly
- Durability: Waterproof and stands up to most chemicals
- Thickness: You can pour it thin or build up thick layers
Once you mix, you’ve got about 30 to 45 minutes to work before it starts thickening. That’s your window for pouring, spreading, and adding color.
Heat will speed up curing, while cold slows it down. Keeping your workspace around 70-75°F usually gives you the best results.
If you need to, you can sand and polish the resin after it cures. The surface takes paint and other finishes if you prep it first.
Resin and Hardener Chemistry
Epoxy resin art relies on mixing equal parts of resin and hardener. The resin contains epoxide groups, and the hardener brings in amine compounds.
Mixing kicks off a chemical reaction—cross-linking—where the molecules bond and create a solid plastic structure.
Here’s how curing usually goes:
- Gel time (30-45 minutes): Still liquid and workable
- Initial cure (4-6 hours): Surface gets tacky but isn’t fully hard
- Full cure (24-72 hours): Completely hard and strong
The reaction generates heat, especially with big pours. Too much heat can make the resin cure too fast or even crack, so don’t overdo it.
Always measure resin and hardener carefully. If you get the ratio wrong, you’ll end up with sticky or soft results. Most art resins use a 1:1 ratio, which keeps things simple.
Essential Materials and Tools
Getting into epoxy resin art means you’ll need some specific supplies, accurate measuring gear, and the right safety equipment. Good resin, reliable tools, and a workspace with fresh air are the backbone of any setup.
Choosing the Right Epoxy Resin
Picking the right epoxy resin is a big deal. Two-part epoxy resin kits come with resin and hardener that have to be mixed in precise ratios.
For art, look for low-viscosity resins—they flow better and trap fewer bubbles. High-viscosity types are better for repairs and heavy-duty stuff.
Think about these features:
- Working time: Usually 20-45 minutes before it starts setting
- Cure time: 12-24 hours for full hardness
- UV resistance: Helps prevent yellowing
- Food safety: Needed if your piece will touch food
UV resin cures fast under a lamp but only works for thin layers. Regular epoxy resin gives you more time and lets you pour thicker.
Don’t buy more resin than you’ll use in a year—old resin sometimes refuses to cure right.
Measuring and Mixing Equipment
Getting the mix right is non-negotiable. Digital scales are the most accurate, especially if you’re working with small batches.
You’ll want:
- Graduated mixing cups with measurements you can actually read
- Disposable plastic cups for small amounts
- Wooden stir sticks or silicone stirrers
- Digital scale that measures down to 0.1 grams
Stir resin and hardener for a solid 2-3 minutes, scraping the sides as you go. Skip metal tools—they can react with uncured resin and mess things up.
Silicone molds make it easy to pop out finished pieces. Clean them well between uses to avoid weird results.
Protective Gear and Workspace Setup
Don’t skimp on safety. Nitrile gloves protect your skin better than latex. Resin can be nasty if you get it on you.
What you’ll need:
- Nitrile or vinyl gloves (not latex)
- Safety glasses for splash protection
- Respirator mask with organic vapor filters
- Apron or clothes you don’t mind ruining
Work somewhere with plenty of ventilation, away from heaters. You really don’t want to breathe in those fumes.
Cover your table with plastic sheeting or silicone mats. Keep paper towels and isopropyl alcohol handy for quick cleanups.
Try to keep the room at 70-75°F. Too cold and it takes forever to cure; too hot and things can get out of hand.
Colorants and Additives for Resin Art
Mica powders bring shimmer and color-shifting magic to your resin work. Alcohol inks? They’re perfect for bold, transparent color and wild blending effects.
Using Mica Powders
Mica powders are super-fine minerals that add sparkle and color to resin. They work in both epoxy and UV resin projects.
Color-shifting mica powders give you that chameleon look—tiny particles that change color depending on the light and angle.
Start with just a pinch. Mica is strong stuff, and you can always add more if you want a bolder look.
Mixing different mica colors lets you create custom shades. Test a little at a time before going all in on your main batch.
White mica powder is a handy base—gives you an opaque white that works solo or blends well with other colors.
Pearl Ex pigments are a solid choice if you want reliable, high-quality shimmer. Tons of color options, too.
Keep mica powders sealed up tight so they don’t soak up moisture. That way, they’ll stay loose and vibrant.
Incorporating Alcohol Inks
Alcohol inks are dye-based and liquid, giving you transparent color and wild blending in resin. They’re great for abstract looks.
These inks dry fast, so you have to move quickly. The alcohol can also speed up the resin’s curing, so keep an eye on your timing.
Blending tricks include dripping, marbling, and layering. Try adding drops of different colors and watch them swirl together.
Always test your ink colors on a sample first. Some combos blend weirdly or shift in unexpected ways.
Fading is a thing—alcohol inks can lose their punch if you leave resin art in direct sunlight for too long.
Don’t overdo it; too much alcohol ink can mess with how the resin cures. Less is usually more.
Clean tools with rubbing alcohol between colors to keep everything crisp and prevent accidental mixing.
Exploring Other Additives
Pigment pastes deliver intense color with just a dab. They’re great for opaque effects and come in metallics like gold or silver.
Thermochromic pigments react to temperature—touch or heat them, and the color shifts. Pretty cool for interactive art.
Iridescent flakes add a rainbow sparkle that changes with the light. They can really make a piece pop.
Glitter and holographic bits give texture and interest. Fine glitter works best—it won’t sink as much while the resin cures.
Natural colorants like freeze-dried fruit powders can give unique hues, but test them first. They sometimes change color or look uneven over time.
Stick to the 10% rule for additives—don’t go over 10% of your total resin volume, or you might run into curing problems.
Core Epoxy Resin Art Techniques
Getting the hang of epoxy resin art means nailing the mix of resin and hardener, experimenting with colorants, and learning how to pour and finish for those eye-catching effects. If you’re after sleek, professional results, you’ll want to get comfy with these basics.
Mixing Pigments and Colorants
Mica powders add shimmer and metallic vibes—toss in just 1-5% of your total resin volume. Mix well so you don’t end up with weird streaks.
Alcohol inks give you those vibrant, see-through colors that swirl and flow. Drop them right into the resin or onto the surface after you pour for some wild effects.
Acrylic paints can work, but keep it under 5% or you’ll risk curing issues. If you can, liquid pigments made for resin are much more reliable.
Always add your colorants after you’ve fully mixed the resin and hardener. Stir gently—no one likes a bubbly mess. Test tiny batches first if you’re chasing a specific color intensity.
Try mixing up separate cups of different pigments before combining them with your main resin batch. It’s a great way to keep control over your final palette.
Layering and Pouring Methods
The puddle pour method is all about pouring colored resin in blobs and tilting your surface so the colors blend in unpredictable ways.
For a dirty pour, layer different colored resins in one cup (don’t mix them), then pour slowly for a marbled look. Consistent height and a steady hand help a lot.
With the flip cup method, stack your colors in a cup, flip it onto your surface, and lift—watch the patterns explode.
Adjust your pour speed and height to control how the colors mesh. Pouring from higher up makes the resin move more, while keeping it low keeps your colors separate.
Stick to thin layers—no more than 1/4 inch. Thicker pours can overheat and mess up your project.
Bubble Removal and Finishing
Hit your resin with a heat gun or torch right after pouring. Sweep it quickly about 6-8 inches above the surface to pop bubbles.
Pre-warm your resin and hardener to room temp before mixing. That cuts down on bubbles. Don’t use hot water or direct heat though—it’s risky.
Use a toothpick to poke at stubborn bubbles before the resin thickens up.
If you’re after super-clear results, a vacuum chamber can pull bubbles out of mixed resin before you pour.
Seal any porous surfaces (like wood) before you pour resin to avoid trapped bubbles.
Let your piece cure fully before touching it. Most resins need 24-72 hours, but it really depends on your workspace conditions.
Popular Projects and Creative Ideas
Epoxy resin opens up a wild range of creative projects—abstract paintings, jewelry, you name it. Here are four project ideas that show off different skills and offer something for just about any level of experience.
Resin Paintings and Abstracts
Resin paintings blend fluid art with that signature glossy finish. You can build up layers of color for depth and motion that’s hard to get with anything else.
Start with a canvas or wood panel. Mix up small batches of resin in different hues or alcohol inks. Pour them in flowing patterns, or grab a stick or spatula to swirl and stretch the colors.
Some favorite techniques:
- Dirty pour with a bunch of colors
- Beach scenes with foamy white edges
- Galaxy vibes using metallic powders
- Geode-inspired slices with crystals
You’ll need to work fast—resin waits for no one. Tilt your canvas to guide the flow, or hit it with a heat gun for wild cells and lacing.
Geode-Inspired Art
Geode art lets you fake those gorgeous stone slices using resin and crystals. The look is bold and dramatic, perfect for statement wall pieces.
Start with a wood panel or canvas. Outline the outer ring with deep colors—think blues or purples—then work your way in with lighter shades, ending with clear or white at the center.
What you’ll need:
- Earth-tone resin colors
- Real crystals or chunky glass
- Metallic leaf or powder for edges
- Silicone molds if you want consistent shapes
Drop in the crystals while the resin’s still tacky so they set in place. Gold or silver leaf along the edges gives it that classic geode sparkle. No two pieces ever turn out the same, which is half the fun.
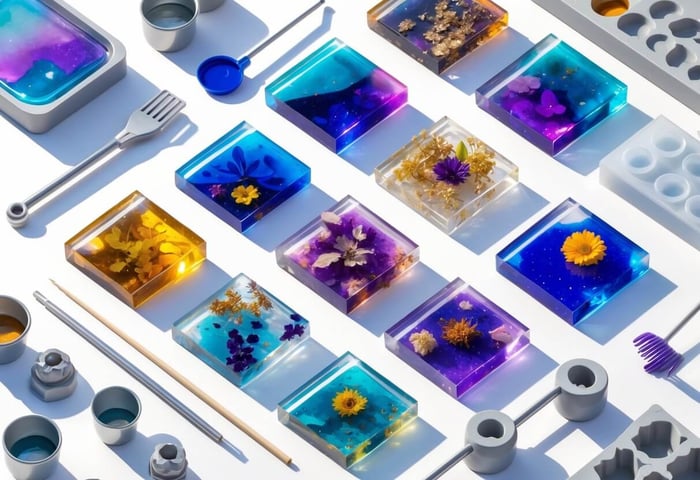
Resin Jewelry Making
Jewelry making with resin is a blast—think custom pendants, earrings, and bracelets using small silicone molds. It’s pretty approachable if you’re just starting out, since you don’t need much resin per piece.
Pick out molds—circles, teardrops, whatever catches your eye. Mix your resin, add colorants, flowers, or glitter, and pour with care to avoid bubbles. Let it cure all the way before demolding.
Some classic jewelry ideas:
- Pressed flower pendants
- Ocean-inspired earrings with blue swirls
- Galaxy rings with a hit of mica powder
- Photo keepsakes in clear resin
UV resin is awesome for jewelry—it cures super fast under a UV lamp. Sand and polish your pieces to finish, then add findings for wearable art.
Ocean-Themed Art
Ocean resin art aims to capture the feel of waves and water using blue and white resins. People often add sand and shells for extra realism.
Pour a clear base, then layer on blues in different transparencies. For foam and waves, mix white resin with a dab of blue and drag it across the surface.
Tips for ocean effects:
- Wave a heat gun for rolling wave shapes
- White pigment makes awesome foam
- Mix real sand into the lower layers
- Add shells and sea glass as accents
Work in thin layers, letting each cure before adding the next. That’s how you get depth and dimension, just like the real ocean.
Working with Silicone Molds
Silicone molds just make life easier—they flex, the resin pops out clean, and you don’t have to fight with stuck pieces. Picking the right size and using good demolding habits goes a long way toward getting great results.
Selecting Mold Shapes and Sizes
Pick molds that fit your project and how much patience you’ve got. Simple shapes are best for beginners, while detailed molds take a bit more finesse.
Think about size before you pour:
- Small molds (under 4 inches) cure quickly and don’t eat up much resin
- Big molds need more time and sometimes extra support
- Deep molds work better if you pour in layers to avoid bubbles
Look for molds with a smooth finish and sturdy edges. Skip anything with sharp corners or thin bits that could rip.
Check for:
- Flexible silicone that bends but doesn’t crack
- No bubbles or flaws in the mold
- Wide opening for easy pouring
- Flat base for even curing
Try out new molds with a small test pour. It’ll help you spot trouble spots before you commit a bunch of resin.
Demolding and Curing Tips
Wait until your piece is totally cured before you mess with the mold. Impatience can ruin both your art and the mold itself.
Rough curing times:
- Thin pieces (under 1/4 inch): 12-18 hours
- Medium (1/4 to 1/2 inch): 24-36 hours
- Thick (over 1/2 inch): 48-72 hours
Check with your fingernail—if the surface is hard and doesn’t dent, you’re good.
To demold safely:
- Flex the edges of the mold away from the resin
- Push from the bottom, working outward
- Never yank the piece out by force
Store molds flat and keep them dry and cool. Wash them with warm soapy water after each use to keep them in shape.
With a little care, silicone molds will last through dozens of projects. Once they get sticky or start tearing, it’s time for a new one.
FAQs
How can I ensure safety when working with epoxy resin for art projects?
Work in a spot with good airflow—open windows, use fans, or even head outside if you can.
Nitrile gloves keep resin off your skin. Latex isn’t a great choice, since some chemicals can sneak through.
Safety glasses protect your eyes from splashes. If you’re inside, a respirator mask rated for organic vapors is a smart move.
Keep your workspace tidy and have paper towels plus isopropyl alcohol on hand for quick cleanup.
Store resin and hardener in a cool, dry spot, away from kids and pets. Always seal containers tightly when you’re done.
What are the steps for creating epoxy resin art for beginners?
Pick a clean, level workspace with lots of airflow. Gather everything you’ll need before you start mixing.
Wipe down your surface with isopropyl alcohol to get rid of dust or grease.
Measure resin and hardener exactly—follow the manufacturer’s ratio, usually 1:1 or 2:1 by volume.
Mix slowly and scrape the sides and bottom for at least 3-5 minutes to make sure it’s all blended.
Pour onto your prepared surface and work quickly—resin starts to set faster than you’d think.
Use a heat gun or torch to zap bubbles, but don’t linger or you’ll risk overheating.
Let your piece cure undisturbed, usually 24-72 hours, depending on the resin brand.
Can epoxy resin be used outdoors, and how does it withstand the elements?
Standard epoxy resin doesn’t stand up to UV—sunlight will yellow and break it down over time. Not great for outdoor pieces unless you take extra steps.
If you’re set on outdoor art, look for UV-resistant epoxy resins. These have additives that help them handle sunlight better.
You can also brush on a UV-resistant topcoat to protect regular epoxy. It adds a layer of defense against fading and yellowing.
Once fully cured, epoxy resin handles temperature swings pretty well. It’s less likely to crack from freeze-thaw cycles than some other materials.
Rain and moisture won’t mess with properly cured resin. The waterproof surface makes it useful for outdoor furniture and decor—just keep the sun in mind.
What materials do I need to get started with my first epoxy resin artwork?
You'll need some epoxy resin and hardener to start—pick a beginner-friendly brand that actually explains how to mix things together. It makes life a lot easier.
Grab some mixing cups and stir sticks. Go for plastic or silicone containers, since resin peels right off once it cures.
Don’t skip the safety gear: nitrile gloves, safety glasses, and a respirator mask. Seriously, you don’t want to breathe this stuff in.
Pick up a few pigments, alcohol inks, or mica powders for color. No need to overdo it—just start with a handful of shades while you get the hang of things.
You'll need a surface to work on, like a canvas, wooden panel, or a silicone mold. Choose something that fits the size of whatever you’re planning.
Keep some isopropyl alcohol and paper towels nearby for cleanup. A heat gun or even a small torch can help pop bubbles out of the resin.
How do I troubleshoot common issues like bubbles and tackiness in epoxy resin art?
Mix resin slowly to cut down on bubbles. Stir it gently and make sure you hit the full recommended time—don’t rush it.
Let your mixed resin rest for a couple minutes before pouring. That way, trapped bubbles have a chance to float up and pop.
Hit the surface with a heat gun or torch after pouring. Move it around fast so you don’t scorch the resin or leave weird marks.
Try to work in a room that’s around 70-75°F. If it’s too cold, you’ll probably get more bubbles and the resin takes forever to cure.
If your piece feels tacky, chances are the mixing ratios were off or you didn’t mix enough. Always measure carefully and stir until you’re sure it’s blended.
Humidity can mess things up too, leaving the surface sticky. If you can, wait for a dry day to pour resin.
If it’s still tacky after two days, sand it down and add a new layer of resin—just make sure you mix it right this time.
What are some advanced techniques for artists working with epoxy resin?
If you want to create depth, try pouring thin layers of resin one at a time, letting each one cure before moving on. It takes patience, but the results can be pretty striking.
Feeling adventurous? Go for a dirty pour: mix several colored resins in a single cup, then dump it all out at once. You’ll get these wild, unpredictable patterns that just kind of do their own thing.
Drop a little silicone oil into your resin and watch as it pushes through, forming those cool, circular cells. It’s a bit unpredictable, but that’s half the fun, right?
You can embed stuff—dried flowers, photos, tiny trinkets—between layers. Suddenly, your artwork’s got this dimensional, almost secretive vibe, like it’s hiding stories inside.
Alcohol inks on wet resin? They spread out and swirl around, especially if you blow on them with a straw or poke at them with a stick. It’s a bit messy, but you get these flowing, abstract effects that are hard to plan for.
If you’re into geode art, try layering crushed glass and metallic pigments with your resin. Build it up bit by bit until it almost looks like a slice of stone. It’s a bit of work, but the shimmer and texture can be worth it.
LET'S RESIN 80oz Crystal Clear Casting Resin Kit,Bubbles Free Epoxy Resin Supplies,Clear Resin for Craft,Tumblers,Molds,Jewelry,Resin and Hardener

$36.99
$43.99
Brand: LET'S RESINColor: ClearFeatures: All in One Resin Starter Kit: LET’S RESIN epoxy resin includes: One 40oz crystal clear resin + One 40oz crystal clear epoxy hardener,6 colors mica powders(5g/pack),1pcs 600ml large silicone cup,10 pcs small measuring cups and more… read more