

Table of Contents
Our Supporting Artisans who helped curate the products on this site will share commissions for purchases made through links in this post.Wood carving turns ordinary chunks of wood into art, practical tools, or thoughtful gifts. It’s an old craft, and while it does demand patience, it’s surprisingly approachable with a little direction and a handful of decent tools.
Getting started is really about grasping the basics, picking tools that feel right in your hand, and slowly building up your technique before chasing after more ambitious projects. Honestly, you don’t need to spend much—just a sharp knife or two and some soft wood, and you’re off.
This guide will walk you through everything from choosing your first carving knife to those final finishing touches that make a piece really pop. You’ll find step-by-step advice, tips on which woods are actually pleasant to work with, and answers to the stuff that tends to trip up beginners.
Key Takeaways
- Start out with simple tools—sharp knives and soft woods are all you need to learn the ropes
- Practice the basics before you jump into tricky or intricate projects
- Finishing techniques aren’t just for looks—they help protect your work and bring out the wood’s natural charm
Wood Carving Fundamentals
At its core, wood carving is about understanding a few basic approaches, learning how to cut cleanly, and figuring out how the grain can work for—or against—you. These are the pillars of pretty much every successful carving project out there.
Types of Wood Carving
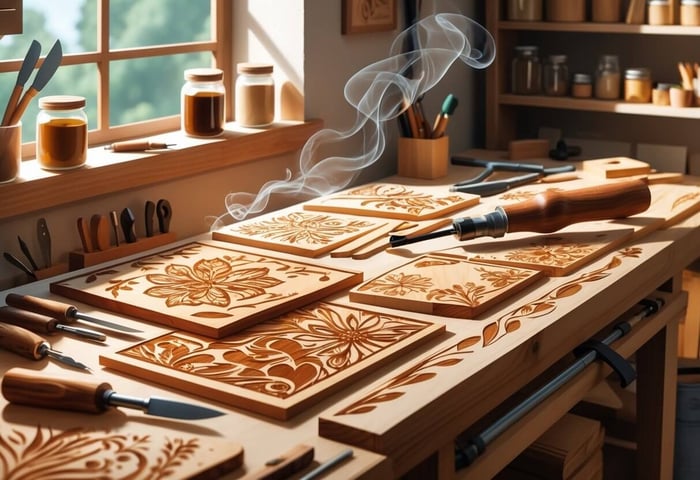
Relief carving is all about creating raised designs on a flat background. You chip away at the surrounding wood so your design stands out. It’s a classic for decorative plaques and signage.
Carving in the round is for making full-on 3D sculptures—think animals, figures, or whatever your imagination cooks up. You’re shaping the wood from every angle, so a bit more planning and skill comes into play here.
Chip carving is a little more geometric. You use a knife and chisel to pop out small triangles and shapes, forming detailed patterns. It’s a solid way to practice knife control and get comfortable with the tools.
Whittling is the simplest—just you and a knife, shaping small pieces of soft wood. It’s great for getting the hang of basic cuts and hand movements without a ton of fuss.
Essential Skills for Beginners
Knife grip matters more than you’d think. Hold your knife kind of like a pencil, thumb along the blade’s side. Let your other hand move the wood instead of just clamping it down.
Basic cuts you’ll use a lot: the push cut (blade moves away from you), the pull cut (draws the blade toward you, thumb in control), and the paring cut (both hands guide for more detail).
Safety habits are non-negotiable. Always carve away from your hands and body. Sharp tools are safer—dull ones will fight you and slip.
Wood selection can make or break your experience. Basswood and pine are forgiving. Stay away from hardwoods like oak until you’re more confident.
Understanding Wood Grain
Grain direction is the way wood fibers run. You’ll spot it on the surface. Go with the grain for smooth cuts—against it, and you’ll probably get tear-out.
End grain is trickier. It’s what you see at the cut ends of the wood, and it’s tougher to carve cleanly. Sharper tools and a lighter touch help here.
Grain patterns change from one wood species to another. Straight grain is easier, while twisty, irregular grain makes for a challenge but can look amazing if you pull it off.
Working with grain is just smart. Plan your cuts to follow the grain when you can. Don’t be shy about turning your piece to get a better angle.
Selecting the Right Tools and Materials
If you want to enjoy carving (and avoid frustration), decent tools and the right wood are key. Sharp blades make your life easier, and some woods are just way more pleasant to work with than others.
Overview of Carving Tools
Carving knives are the heart of your kit. A basic knife with a 2-3 inch blade covers most bases. It should stay sharp and feel good in your grip.
Gouges help scoop out curves and hollow spaces. Grab a handful of sizes—1/4, 1/2, and 3/4 inch are a good start. U-shaped gouges move a lot of wood fast.
Chisels are for straight cuts and cleaning up edges. Flat chisels in a few widths (1/4, 1/2, 1 inch) are handy, and skew chisels help with angled cuts and smoothing.
V-tools make crisp lines and details. A 60-degree V-tool is pretty versatile for most fine work—hair, feathers, you name it.
Sharpening tools are a must. Stones in 400, 1000, and 4000 grit will do the trick, and a leather strop with some polish keeps your edge keen.
Choosing the Best Wood for Carving
Basswood is just about perfect for newbies. It’s soft, cuts easily, and the light color really shows off detail. Plus, the grain is nice and even.
Butternut is a bit firmer but still carves smoothly, and its grain looks great.
Pine is cheap and available, but those resin pockets can gum up your tools. The grain can also be a pain, flipping from soft to hard in the same piece.
Walnut and cherry are gorgeous, but they’re tougher to carve. Save them for when you’ve got some miles under your belt.
Make sure your wood is properly dried. Fresh (green) wood will crack and shrink as it dries out. Aim for pieces with 6-12% moisture if you can find them.
Safety Equipment and Practices
Cut-resistant gloves are a good idea, especially when you’re starting out. Look for ones made for woodworking—they should fit snug but not squeeze.
Safety glasses are a must. Wood chips can fly up without warning, and your eyes aren’t worth risking.
Thumb guards slip on when you’re doing detail work. They’ll save your thumb from accidental nicks.
Always carve away from yourself, and keep your hands behind the blade. Sharp tools are genuinely safer since you don’t have to force them.
Good lighting is underrated—carve near a window or get yourself a bright desk lamp. Shadows hide mistakes (and hazards).
Keep your tools sharp and clean. Dull blades are just accidents waiting to happen, and clean tools last longer anyway.
Core Carving Techniques
Most carving comes down to a handful of main techniques, each with its own vibe. Whether you’re making simple cuts or going for a full 3D sculpture, you’ll use these methods again and again.
Whittling and Chip Carving
Whittling is just shaving off small bits with a sharp knife, keeping your cuts thin and controlled. Hold your knife at a slight angle—about 20 degrees—and always cut away from yourself.
Common whittling cuts:
- Push cut: Thumb pushes the blade through the wood
- Pull cut: Knife moves toward your thumb, but you’re in control
- Paring cut: Both hands work together for more precise moves
Chip carving is about popping out little triangles to make patterns. Three cuts meet at a point, and the chip lifts right out. Start simple—straight lines and triangles—before getting fancy with curves. Basswood and butternut are forgiving here.
And seriously, keep your knife sharp. Dull blades just make things harder (and more dangerous).
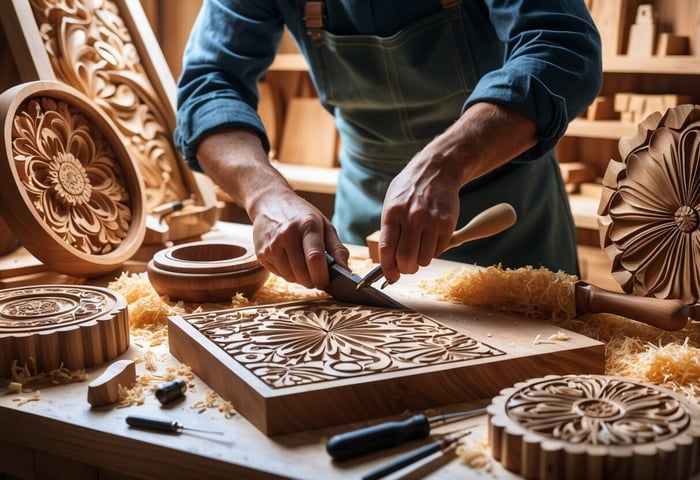
Relief Carving Essentials
With relief carving, you’re removing the background to make your design stand up from the surface. It’s a neat way to play with light and shadow while keeping everything attached to one side.
Main types of relief:
- Low relief: Design pops out just a bit—maybe 1/8 to 1/4 inch
- High relief: More dramatic, sticking out half an inch or more
- Sunken relief: Design is actually below the surface
Start by sketching your idea right on the wood. Outline with a V-tool, then use flat chisels to clear the background. Don’t rush—take off a little at a time, working across the grain first to avoid tear-out. Round off edges with smaller gouges for smooth transitions. It helps to sand lightly between stages so you can see where you’re at.
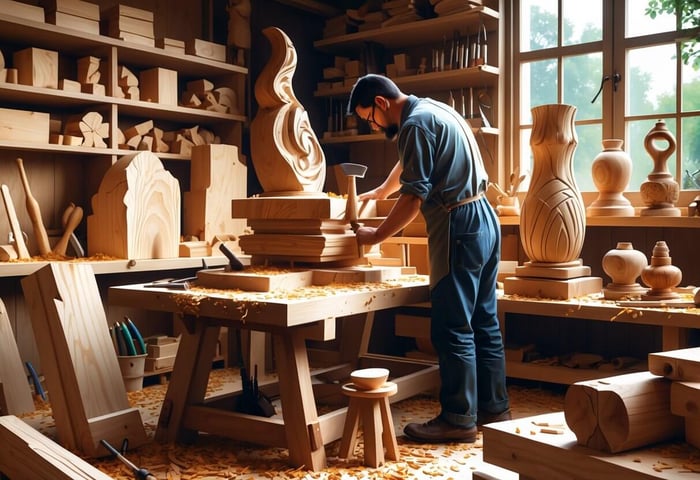
Carving in the Round
Carving in the round means you’re making a sculpture to be seen from every side. It does take more planning and patience, but it’s pretty rewarding.
Draw your design on all sides of your block. If you have access to a band saw or coping saw, use it to rough out the shape before you get into the details.
Basic steps:
- Block out the main shape with large gouges
- Refine the form and add key details
- Add fine detail and texture to finish
Keep rotating your piece so everything stays in proportion. Take a step back now and then to see it with fresh eyes and make tweaks. Pay attention to grain direction, too—vertical grain is better for tall, slender pieces, while horizontal grain is ideal for wider, more stable shapes.
Step-By-Step Carving Process
Getting set up the right way makes carving way more enjoyable. A well-lit workspace, a solid table, and a plan for your design will help you actually finish your first projects (and keep all your fingers).
Preparing Your Workspace
Find a spot near a window or set up a bright lamp—100 watts or more, if you’re counting. You want to see every cut clearly.
Pick a table that hits your elbow height when you’re standing. It’ll save your back, especially if you get caught up and lose track of time.
Workspace must-haves:
- Non-slip mat or carving board
- Sharp knives and gouges
- Sharpening stones (400 and 1000 grit work fine)
- First aid kit (just in case)
- Dust mask and safety glasses
Keep your tools close, maybe on a towel so they don’t roll off or get dinged up.
Try to avoid distractions—phones, loud music, whatever pulls your focus. Carving isn’t something to do half-attentively.
Store your wood somewhere dry and nearby. Changes in moisture can mess up your work before you’re even done.
Transferring Designs to Wood
Sketch your design on paper first. Simpler is better for your early attempts—don’t overcomplicate it.
Slip a sheet of carbon paper between your drawing and the wood. Go over the lines with a pencil or stylus to transfer the image.
Other ways to transfer designs:
- Print on regular paper and glue it right onto the wood
- Draw freehand directly on the wood with a pencil
- Cut out cardboard templates if you want to repeat shapes
Mark the wood’s grain direction with arrows. You’ll want to carve with the grain, not against it.
Use a ruler to mark depth lines along the wood’s edge—handy for avoiding accidental deep cuts.
Make sure your transferred design is dark and clear enough. Faint lines will vanish as soon as you start carving.
Basic Cutting and Shaping Methods
Begin with stop cuts—these are vertical cuts along your design that help keep the wood from splitting where you don’t want it to.
Follow up with paring cuts, angled slices that remove chips. A sharp knife makes all the difference here.
Basic cutting order:
- Make stop cuts along the main lines
- Clear out waste wood with paring cuts
- Shape curves using gouges
- Smooth everything out with finer cuts
Hold your knife like a pencil, but grip it with intention. Always keep your thumb behind the blade—can’t stress that enough.
Cut away from your body and hands. Use clamps or a vise to keep your wood steady.
Take off small amounts of wood at a time. Deep cuts can split the wood or send your knife off course.
Try out your cuts on scrap wood first. Every wood type has its own quirks, so it’s good to get a feel for it.
Finishing and Detailing Your Work
Finishing is where things really come together. With the right sanding, textures, and finish, your carving suddenly looks intentional, not just hacked out of a block. It’s honestly kind of magical when it all clicks.
Sanding and Smoothing Techniques
Start with 220-grit sandpaper for the rough stuff. Work up to 400-grit if you want things silky smooth.
Sand with the grain. Go against it, and you’ll see scratches later—trust me.
Flat areas? Use sanding blocks. For curves, wrap sandpaper around a dowel or pencil.
Folded sandpaper gets into tight details. Don’t press too hard or you’ll lose your fine work.
Use good lighting, preferably from the side, to spot scratches or roughness you might otherwise miss.
Clean off sanding dust between grits—tack cloth or compressed air works. Skipping this step leaves scratches behind.
If you’re working on tiny details, 0000 steel wool is great. It flexes into awkward spots where sandpaper just won’t go.
Adding Texture and Depth
Burning lines with a woodburning tool can really bring fur, hair, or feathers to life. Keep the tool moving or you’ll end up with scorch marks.
For bark, drag a wire brush over the surface. Change up the pressure for a more natural look.
Carving gouges let you put in those last little details—scales, wrinkles, grain, whatever fits your piece.
Stippling with a stiff brush gives a rough, pebbly texture. Just dab straight down, don’t sweep.
Cross-hatching with a V-tool is a classic way to add shadows. Lay down some parallel lines, then cross them at an angle.
Punches or stamps are a quick way to make repeated patterns. You can improvise these with nails or metal rods.
After texturing, sand lightly to knock off splinters but leave the texture intact.
Sealing, Painting, and Staining
Put down wood conditioner before staining soft woods like pine. Otherwise, you’ll get blotchy color patches.
Oil-based stains soak in deeper and stay wet longer, but the colors are richer. Water-based dries fast but can look a bit flat.
Foam brushes help spread stain evenly. Wipe off the extra with a clean rag after 5-10 minutes.
Acrylic paints are good for details. Thin them with water if you want a lighter touch.
Seal painted work with polyurethane or lacquer. Thin coats are best, and a quick sand with 400-grit between layers keeps things smooth.
For a more natural look, Danish oil or tung oil soaks in and protects from within.
Finish up in a dust-free spot if you can. Room temperature (65-75°F) gives the best results—too cold and finishes get sticky.
Advanced Wood Carving Tips
Sharp tools are a must. Dull blades just chew up the wood and make you work twice as hard. Give your tools a quick check before you start.
Grain direction matters—seriously. Carve with the grain whenever you can. You’ll avoid splits and have way more control.
A leather strop is your friend for keeping tools sharp between proper sharpenings. A few quick passes and your edge is back in business.
Stay in control with these habits:
- Take shallow slices, not deep chunks
- Keep your non-carving hand safely behind the blade
- Wear a carving glove for peace of mind
- Clamp or vise your piece so it doesn’t wander
How you sit actually affects your carving. Good posture and keeping your work at chest height make a big difference—less fatigue, better accuracy.
Picking the right wood is crucial for advanced work. Go for straight, even grain and steer clear of knots or weird defects.
Relief carving is a great way to get better. Start with simple leaves, then try more complicated scenes once you’re comfortable. It’s a solid way to learn about depth and shadows.
Advanced carvers reach for these specialty tools:
- Bent gouges for hollows and curves
- V-tools for crisp lines
- Fishtail chisels to sneak into tight spots
- Palm tools for tiny details
Temperature matters more than you’d think. Cold wood is brittle and chips out. Let it warm up to room temp before you start carving.
FAQs
What are the essential tools needed to start wood carving?
You’ll want three knives to begin with: a carving knife for most work, a detail knife for the small stuff, and a gouge for clearing out bigger areas.
A sharpening stone is important—dull tools are dangerous and just plain frustrating. A leather strop keeps your edge keen between full sharpenings.
Have sandpaper in a few grits. 120-grit for rough shaping, then 220 and 400 for smoothing things out.
A proper carving glove is a good investment. Don’t grab a generic work glove; get one made for carving.
How do you choose the right type of wood for a carving project?
Basswood is the go-to for beginners. It’s easy to cut, shows detail nicely, and takes stain pretty well.
Pine is tempting but tricky—those hard and soft spots can really throw you off. Maybe save it for later.
Butternut carves like a dream and looks great, but it’s pricier than basswood.
Hardwoods like oak or maple? They’re tough for beginners. Tackle them once you’ve got the basics down.
What are the different wood carving techniques and their uses?
Relief carving gives you raised images on a flat background—great for signs or panels.
Chip carving is all about small, precise triangular cuts for geometric patterns. You’ll see it on boxes and decorative pieces.
Whittling is more freeform—just you, a knife, and a block of wood. It’s perfect for small figurines.
Power carving uses electric tools to rough things out quickly, but you’ll still want hand tools for the details.
Can you provide safety tips for beginners to prevent injuries while carving?
Always cut away from yourself. Even a tiny slip can be serious if you’re pulling the blade toward your hand.
Keep your tools sharp—less force means less chance of a slip.
Wear a carving glove on your holding hand. Regular gloves don’t cut it here (pun intended).
Clamp your wood down before you start. If it moves, you’re way more likely to get hurt.
Take breaks when your hands get tired. Fatigue leads to mistakes.
What is the best way to maintain and sharpen wood carving tools?
Sharpen on a stone with water or oil, holding the blade at about 20 degrees. Smooth, even strokes are the way to go.
Start with coarse grit for nicks, then move to finer grits for a polished edge. 1000-grit is a good all-around choice.
Strop on leather after sharpening to get rid of the burr. Stropping compound helps, but isn’t strictly necessary.
Wipe your tools clean after each session—dust and moisture are the enemy. Store them dry to avoid rust.
Check your blades before you start carving. Fix any nicks or dull spots right away—it’s worth the time.
How do you finish and protect a wood carving once it's completed?
Start by sanding your carving with fine-grit sandpaper. Usually, 220-grit is a good place to begin, then you can move up to 400-grit if you want things extra smooth. Just be careful not to overdo it—those little details can disappear fast if you're too aggressive.
If you're planning to stain the wood, a wood conditioner can make a real difference. It helps the stain soak in evenly, but honestly, if you prefer the natural look, go ahead and skip it.
When it comes to finishing, thin coats are your friend. You can use a brush or a cloth—just follow the grain. Don't rush it; let each coat dry fully before you even think about the next one.
For something that'll get handled a lot, polyurethane is tough to beat. Want something that feels more organic? Tung oil soaks in and leaves a subtle sheen. Paste wax is pretty low-commitment and makes touch-ups a breeze, though it won’t stand up to heavy use.
Two coats of finish is usually enough, but if the piece is going to see a lot of action, three coats might be worth the extra effort.
Wood Whittling Kit for Beginners-Complete Whittling Set with 4Pcs Wood Carving Knives & 8Pcs Basswood Wood Blocks-Perfect Wood Carving Kit

$19.99
$23.99
【19PCS Complete Wood Carving Set】Professional Wood Whittling Kit for Beginners included 4 whittling knives, 8 basswood wood blocks,1 Wood Carving Spoon Blank,1 pair of Cut-Resistant Gloves, Leather Strop, polishing compound, sharpening stone, and portable storage bag. 【Professional Woodworking carving knife】Our… read more