
Table of Contents
Our Supporting Artisans who helped curate the products on this site will share commissions for purchases made through links in this post.Rotary tools let you turn a flat wooden plaque into striking three-dimensional wall art using relief carving. By removing wood at different depths, you create raised surfaces that play with light and shadow, making your work stand out in a big way.
You can get the hang of rotary tool relief carving if you pick the right tools, plan your design, and carve methodically. These days, you’ve got the option to mix classic hand-carving skills with digital 3D relief modeling tools that help you picture the finished piece before you ever touch the wood.
Starting out, you’ll want to get familiar with your tools, choose the right wood, and work on building steady hand control. It’s not the fastest process, but if you stick with it, you’ll end up with wall art that can honestly hold its own against fancy gallery pieces.
Key Takeaways
- Relief carving uses rotary tools to remove wood at different depths, creating raised designs that appear three-dimensional
- Success depends on choosing the right cutting bits, planning your design carefully, and working systematically from shallow to deep cuts
- Proper mounting and finishing techniques transform your carved piece into professional-quality wall art ready for display
Understanding Rotary Tool Relief Carving
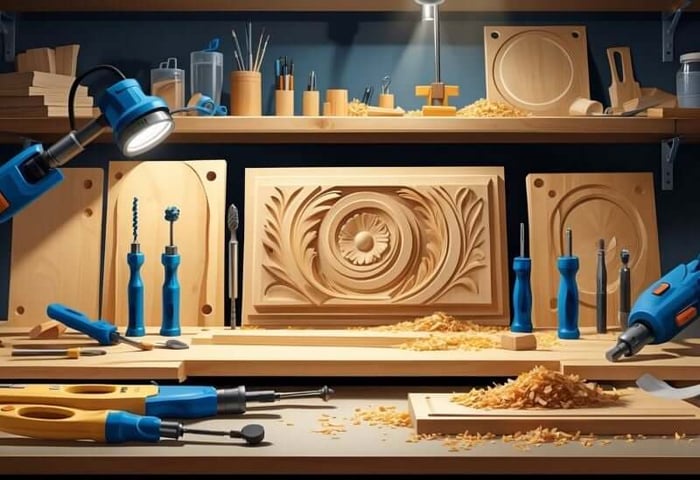
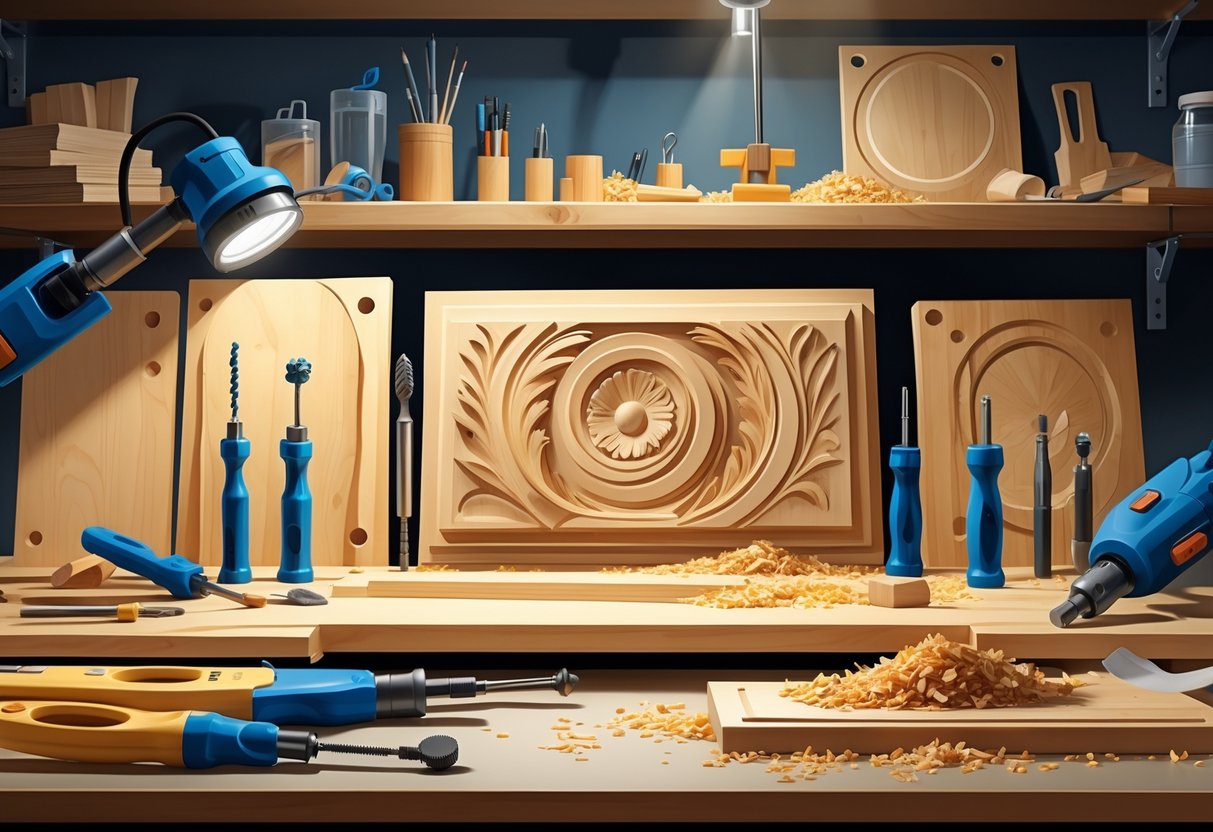
Relief carving lets you create three-dimensional images on a flat surface by trimming away wood around your subject. Rotary tools give you the control you need for everything from straightforward plaques to wall art with wild textures and depth.
What Is Relief Carving?
Relief carving involves sculpting three-dimensional images on flat surfaces by removing wood around the subject to create a raised design. The carved elements appear to project from the background surface.
You’ll work with different depths to punch up the visual effect. Low relief barely rises above the background, usually less than half the carved element’s thickness. High relief stands out more, throwing deep shadows and making the details pop.
You have to think in layers: set your background level, build up mid-levels, then bring out the highest points. Each layer adds a bit more depth and interest.
Your design stays attached to the backing, so it’s not a sculpture in the round. That means your piece keeps its structural strength, even as you carve away the background.
Differences Between Flat Plaque and 3D Wall Art
Flat plaques usually stick to one level for the background and don’t go deep. You’ll carve details that rise maybe 1/8 to 1/4 inch above the surface—great for signs or simple panels, especially if you’re just getting started.
Flat Plaque Characteristics:
- Single background depth
- Limited shadow play
- Simpler tool requirements
- Faster completion time
3D wall art cranks up the complexity, with layers at different depths and some undercutting. You get bold shadows and shifting perspectives as the light changes. These projects demand more planning and a steadier hand.
3D Wall Art Features:
- Multiple depth layers
- Complex shadow effects
- Undercut details
- Varied viewing perspectives
Moving from flat to 3D means you have to master depth control with your rotary tool. You’ll tweak speed, pressure, and bit choice to carve at just the right level.
Benefits of Rotary Tool Relief Carving
Rotary tools give you a level of detail and control that’s hard to match with traditional chisels. You can lay down textures, crisp lines, and smooth curves, and the variable speed settings let you adapt to whatever wood you’re working with.
Key Advantages:
- Precise material removal
- Consistent cut quality
- Reduced hand fatigue
- Versatile bit selection
The small size lets you get into tight spots and pull off undercuts that bigger tools just can’t manage. You can switch from roughing out big areas to adding tiny details without missing a beat.
Rotary tools excel at creating textures like fur, feathers, or bark patterns. The spinning action makes it easy to get even, repeatable textures that bring your carving to life.
They’re also safer, honestly. You keep better control and avoid the slips you might get with hand tools. Plus, the steady cutting action cuts down on tear-out and splinters, even in tricky grain.
Essential Tools and Materials
Picking the right gear can make or break your relief carving experience. The rotary tool, your wood, and the bits you use all have a big say in how your project turns out—and whether you actually enjoy the process.
Selecting the Right Rotary Tools
Your choice of rotary tool really shapes how precise you can get and how your hands feel after a long session. Variable speed is a must for relief carving.
Power and Speed Requirements Go for tools that run anywhere from 5,000 up to 35,000 RPM. Lower speeds are best for detail and finishing, while higher speeds chew through material faster.
Corded vs. Cordless Options Corded tools keep the power steady for long jobs—no battery anxiety. Cordless tools, though, are easier to maneuver, especially on bigger pieces. Most batteries last 45 to 90 minutes if you’re carving non-stop.
Grip and Control Features Pencil-grip styles give you the most control for fine detail, and they’re easier on your hand when you’re working small. Palm-grip models pack more punch for roughing out shapes, so they’re good for the heavy lifting.
Essential Features to Consider
- Collet system compatibility (1/8" and 3/32" are most common)
- Tool-free bit changing mechanisms
- Dust collection ports for cleaner work
- LED work lights for better visibility
Choosing Wood Types for Relief Carving
Your wood choice affects everything from how easy it is to carve to how your finished piece looks. Grain and hardness make a big difference in how your rotary tool handles the job.
Beginner-Friendly Options Basswood is a favorite—it’s soft, has a mild grain, and takes stain or paint well. Pine is cheap and comes in big panels, forgiving if you slip up while learning.
Intermediate Wood Choices Poplar is a bit tougher but holds fine details nicely and has a nice grain. Cherry is harder, but it ages beautifully and gives you super-clean cuts if your bits are sharp.
Wood Preparation Requirements
| Wood Type | Grain Direction | Pre-Sanding | Moisture Content |
|---|---|---|---|
| Basswood | Minimal concern | 220-grit | 6-8% |
| Pine | Avoid hard knots | 180-grit | 8-10% |
| Poplar | Work with grain | 220-grit | 6-8% |
| Cherry | Follow grain lines | 320-grit | 6-7% |
Accessory Bits and Attachments
The bits you choose really turn your rotary tool into a carving machine. Different cutting edge shapes each have their own specialty in relief carving.
Rough Shaping Bits Carbide burrs are fast for blocking out the big shapes. Ball burrs are good for scooping out concave areas, while cylinders flatten backgrounds. Tree-shaped burrs help with organic curves.
Detail and Finishing Bits Diamond-coated bits stay sharp longer and cut smoothly in harder woods. High-speed steel bits are affordable and do most jobs well, plus you can sharpen them yourself.
Specialized Relief Carving Attachments V-groove bits make crisp lines between different parts of your design. Flame-shaped bits are great for adding leaf or feather textures.
Bit Maintenance Essentials
- Cleaning brushes for resin removal
- Sharpening stones for steel bits
- Proper storage cases to prevent damage
- Spare collets for secure bit holding
Carbide Burr Set Compatible with Dremel 1/8" Shank 10PCS Die Grinder Rotary Tool Rasp Bits

$13.99
Double Cut: Produces a finer finish than single cut and reduces the size of the chips and slivers. It also gives greater tool control. A Must-Have: The 10-PC carbide burrs kit is a great assortment. The differing profiles let wood… read more
Planning and Designing 3D Wall Art
Really impressive 3D wall art starts with solid planning and smart design. You’ll need to think about depth, how thick your wood is, and how the light will play off the surfaces you carve.
Creating Original Designs
Sketch your ideas by hand first—it’s easier to tweak things before you commit. Keep your relief depth less than a third of your wood’s thickness, or you risk weak spots that might break later.
Light direction matters. Shadows are what make relief carving look dramatic, so place your raised areas where they’ll catch the light best.
Simple shapes work best when you’re starting out. Fussy details can get lost or turn into a pain to carve cleanly.
Design elements to consider:
- Background texture patterns
- Main focal points at varying heights
- Smooth transitions between depths
- Edge treatments and borders
Draw your design at full size if you can. It’s the easiest way to spot details that are too tiny or too close together.
Sourcing and Modifying Relief Models
Free 3D relief files are a handy resource, especially if you’re still learning. Lots of hobbyists use these to practice toolpaths and get a feel for carving.
Pick files in STL, RLF, or OBJ format, and double-check that the resolution fits your project.
Popular file sources include:
- CNC design marketplaces
- Maker community forums
- Software manufacturer libraries
- Educational websites
Don’t be afraid to tweak existing designs to fit your vision. Change the size, but keep your depth ratios in check.
Try combining different relief elements, stacking textures, adding borders, or merging in some new details. Always test a small section first to see how it’ll look before committing to the whole piece.
Transferring Patterns to Wood
Place your design on the wood and pay attention to the grain and any knots or quirks in the surface.
Mark your zero points clearly with a pencil. That’s where you’ll start with your router bit for reference.
If your design has multiple parts, add registration marks. A couple of tiny drilled holes make good reference points.
Setup checklist:
- Wood is flat and smooth
- Design fits the material
- Zero points are marked
- Clamps won’t block toolpaths
Double-check your material thickness settings in the software. Measure the wood at a few spots, just to be sure.
Clamp your workpiece securely but don’t crank down too hard—over-tightening can warp the wood and mess up your carving.
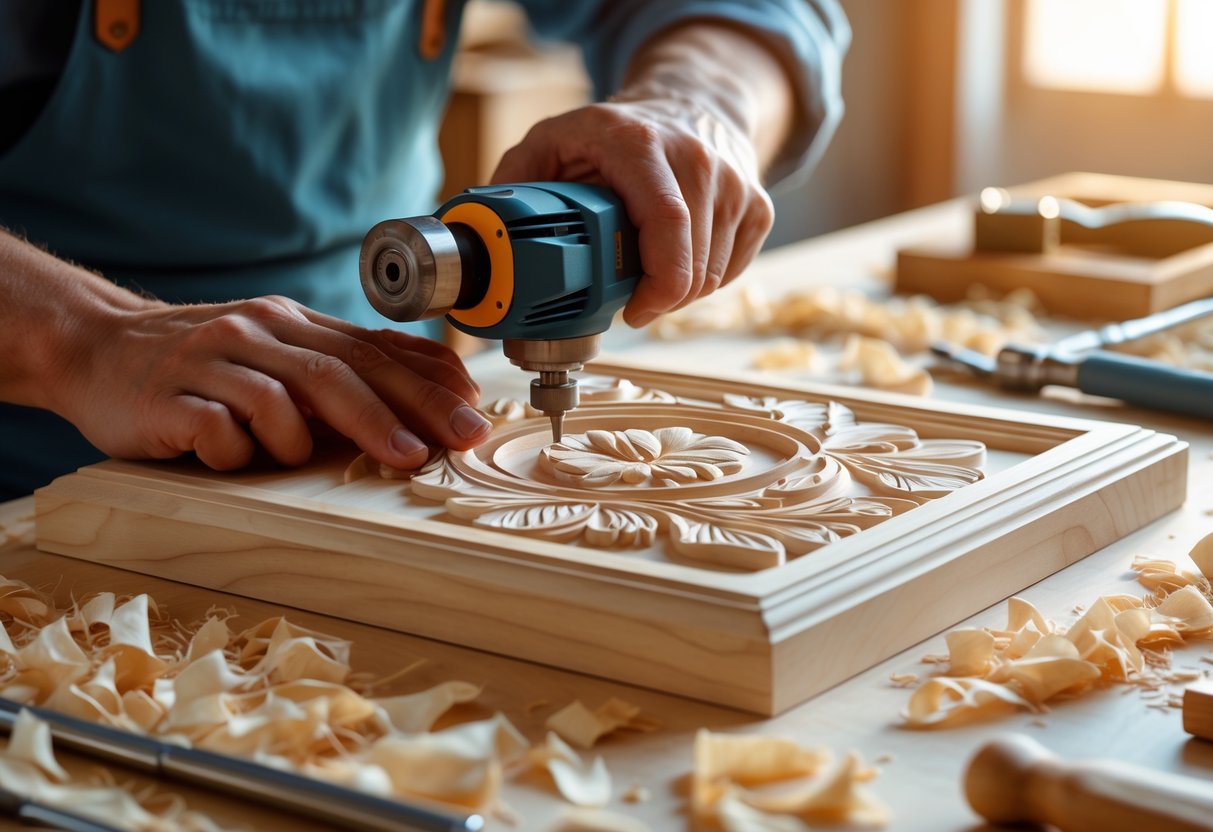
Step-by-Step Rotary Tool Carving Process
Using a rotary tool for relief carving turns a flat board into dimensional artwork by letting you control depth and layer your cuts. Getting good results depends on prepping your surface, planning your depths, adding texture, and finishing in a way that makes the piece pop.
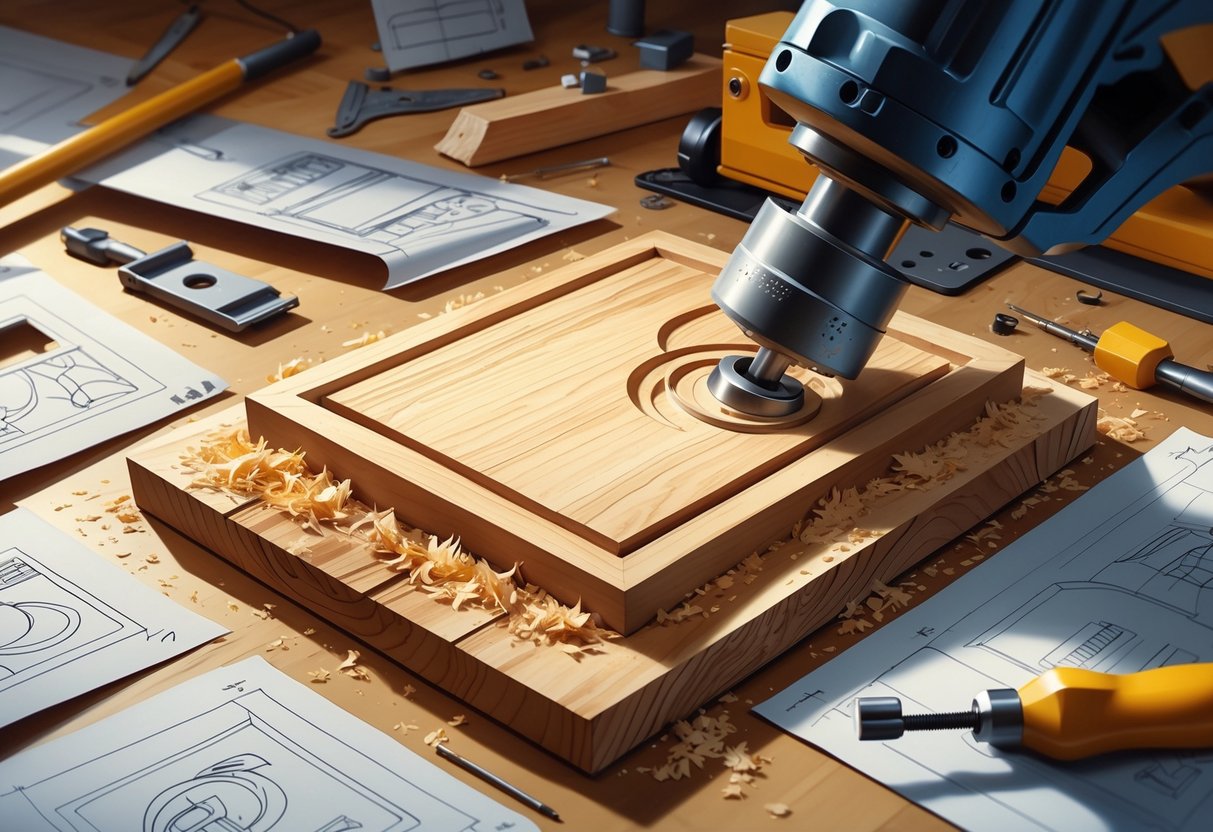
Preparing the Flat Plaque Surface
Pick your wood plaque and sand it with 120-grit until it feels nice and smooth. Blow off dust with compressed air or swipe it away with a tack cloth. A clean surface keeps your bits from clogging and helps you get crisp cuts.
Transfer your design with carbon paper or a printed template. Tape it down so it doesn’t shift while you trace. Use a ballpoint pen to go over all the main lines and details.
Mark different depth levels right on the design—symbols or numbers work. Level 1 is for your deepest spots, Level 2 for mid-depth, and Level 3 for surface stuff. This way, you won’t get confused as you go.
Pick your starting bit based on the wood. For pine or other softwoods, a medium-grit sanding drum works. If you’re using hardwood, grab a coarse carbide cutter. Always carve with the grain to avoid splintering and get cleaner lines.
Set your rotary tool to medium speed (15,000-20,000 RPM) to start roughing out. Higher speeds can scorch the wood or tear out detail, especially in delicate spots.
Establishing Depths and Layers
Start by carving out the deepest background areas first with a large sanding drum or a cutting bit. Move across the background in a systematic way, keeping the depth even. Keep the tool moving so you don’t dig holes or burn the surface.
Remove material around the main design elements to make your primary relief layer. Go to about 1/8 inch deep for more dramatic relief. Take it slow—use overlapping passes rather than trying to hog out all the wood in one shot.
Carve out mid-level details next. These should be about half as deep as your background cuts. Check your progress a lot—run your finger over the surface to feel the height difference.
Swap in smaller bits for tight spots and intricate details. High-speed cutters or small sanding drums are good for this. Keep your angles consistent when you’re working on sloped parts between layers.
Depth Guidelines:
- Background: 1/8 to 1/4 inch deep
- Mid-level: 1/16 to 1/8 inch deep
- Surface details: 1/32 to 1/16 inch deep
Adding Texture and Details
Switch to detail bits like tiny ball cutters or pointed bits for fine textures. These are great for fur, feathers, or simulating wood grain.
Follow natural patterns for directional textures—veins in leaves, fur in the direction it grows. Go easy on the pressure to avoid gouging your work.
For bark or stone, try stippling with a small round bit in a random pattern. Vary the depth a bit for a more natural look.
Try V-tools and gouges made for rotary tools to cut sharp lines and curves. They’re especially handy for crisp edges and shadow lines.
Work from broad textures to small details. Get the big stuff done first, then go in and add things like scales or individual hairs. That way, you won’t mess up your fine work later.
Finishing Touches for 3D Effect
Use small angled bits to carve undercuts beneath raised spots. These shadows can really make the 3D effect pop. Tilt the tool to sneak just under the edges of higher areas.
Smooth transitions between depth levels with fine sanding drums. Gradual slopes look a lot more natural than sudden drops. Blend things together where elements overlap.
Add your final surface details—tiny marks or decorative flourishes—with the smallest bits you’ve got. Go slow, and drop your speed to around 8,000-12,000 RPM for better control.
Check your work with a flashlight at different angles. You’ll spot places that need deeper undercuts or more texture. Side lighting should throw strong shadows and show off the dimensional effect.
Final bit progression:
- Coarse cutting (roughing)
- Medium sanding drums (smoothing)
- Fine detail bits (texturing)
- Polishing bits (final finish)
Give it a light sanding with 220-grit to knock down tool marks but keep your carved details sharp.
Digital Tools for Relief Carving Enhancement
Software like Carveco has really changed how you can approach relief carving, letting you turn 2D artwork into 3D models. You can import art and mix traditional rotary techniques with CNC accuracy for some pretty slick results.
Using Carveco for Relief Creation
Carveco Maker Plus offers tools to build up complex reliefs from basic vectors. The extrude tool lets you pull flat shapes up into dimensional forms, and you can control both the depth and the angle.
Stack different elements at various heights to create multiple layers of relief. This gives you visual depth that would take forever to do by hand. The software figures out the right angles and transitions for you.
The dynamic rotary relief modeling lets you wrap designs around curved surfaces. That’s especially handy for columns or decorative posts.
Key Carveco Relief Tools:
- Vector extrusion with custom profiles
- Stacking relief layers
- Automatic depth calculations
- Rotary axis wrapping
Importing and Editing 3D Models
You can pull in STL files and other 3D formats right into your relief carving software. This means you can use models from online libraries or even scan real-world objects to recreate them in wood.
Relief Maker software lets you flatten 3D models into carvable reliefs at any angle, keeping the important details intact.
Most programs let you combine different 3D elements into one relief. Maybe you want to merge architectural bits with natural textures, or add some text to a decorative panel.
The software takes care of adjusting relief depth to match your material, so you don’t accidentally cut through thin stock and you get the most visual punch possible.
Integrating CNC and Rotary Techniques
CNC routers can handle the heavy lifting—removing most of the material—while rotary tools let you add the fine details by hand. That way, you get both machine precision and that hand-finished feel.
Set up your CNC to leave a little extra wood in detailed spots, then come back with rotary tools to finish textures and smooth out transitions between layers.
CNC clipart libraries are packed with ready-to-machine 3D reliefs you can drop into your own projects. Super helpful for common decorative bits when you don’t want to model everything from scratch.
Workflow Steps:
- Build your base relief in software
- Generate CNC toolpaths for roughing
- Machine out the main shapes and depths
- Finish details by hand with rotary tools
- Add final textures and tweaks
Mounting and Displaying 3D Wall Art
How you mount your relief carving really matters—it keeps the piece safe and helps show off the dimensional details. The right frame and a bit of care go a long way in protecting your work.
Preparing Artwork for Hanging
Give your carving a solid backing before you hang it. Sand the back nice and flat for even contact with the wall.
Pick mounting hardware to match the weight and size. For pieces under 10 pounds, heavy-duty picture wire works well. Attach it to eye screws about a third of the way down from the top.
If your piece is over 10 pounds, use French cleats or keyhole hangers. French cleats help spread the weight. Rout a groove about 1/4 inch deep for the cleat on the back.
Weight Guidelines:
- Under 5 lbs: Picture wire with eye screws
- 5-10 lbs: Heavy-duty wire with D-rings
- 10-20 lbs: French cleats or keyhole hangers
- Over 20 lbs: Multiple wall anchors with cleats
If your carving has deep recesses, add a backing board to keep dust out and give extra support.
Frame and Border Ideas
Shadow boxes are great for carvings with a lot of depth. Pick a box that gives you at least an inch or two of space beyond the highest point.
Simple wooden frames look good with natural wood carvings. Try matching or contrasting the frame wood—oak frames with pine carvings can look especially nice.
Metal frames fit well with modern or geometric designs. Aluminum or steel keeps things clean and doesn’t distract from your carving.
Floating frames give a bit of space between the art and the frame, making the 3D effect stand out even more.
Border treatment options:
- Beveled edges using a router
- Burned borders with a wood burning pen
- Painted accent borders
- Natural live edge finish
Or just leave the carving unframed for a rustic vibe. Sand the edges and stain them to match the rest of your piece.
Preservation and Care
Put on a protective finish before you hang your work. Polyurethane guards against moisture and handling. Satin finish works well—gloss can be a bit much sometimes.
Tung oil keeps the natural feel and texture. Three thin coats, sanding lightly between each, usually does the trick.
Keep your carving out of direct sunlight to avoid fading or warping. Hang it on an inside wall, away from heat vents or AC units.
Dust your carving once a month with a soft brush to get into the crevices. For really tight spots, a blast of compressed air helps.
Maintenance schedule:
- Weekly: Light dusting with a microfiber cloth
- Monthly: Detailed cleaning with a soft brush
- Yearly: Check hardware and finish
Check your mounting hardware every year for loose screws or worn wire. Tighten or replace as needed before anything gives way.
Watch out for cracks or wood movement, especially when seasons change. Fill tiny cracks with matching wood filler and touch up with stain if needed.
FAQs
What are the essential wood carving tools for beginners to start with?
You'll want a variable-speed rotary tool to kick things off. Most wood carving works fine between 10,000 and 15,000 RPM, so stick in that range as you get comfortable.
Grab some high-speed steel cutting bits for removing bulk material. If you plan to work with hardwoods, carbide bits hold up longer and make the job easier.
Structured tooth carbide bits come in handy for finishing cuts. I like using round and cylindrical shapes for curves and those tricky concave spots.
Don't forget sanding drums in different grits, maybe 80 up to 220. They smooth out rough spots and get your surface ready for whatever finish you want to apply.
On the safety side, dust masks, safety glasses, and decent lighting are must-haves. You really need good ventilation to keep the dust down, too.
How can you transition from flat wood plaques to three-dimensional relief carving?
Try adding some raised elements to your usual flat designs. Even simple shapes like leaves or geometric patterns with a little depth make a difference.
Sketch out your depth levels with a pencil before you start cutting. Mark off what stays at the surface and what gets carved away. It saves a lot of guesswork.
Start with low-relief projects where the highest points barely rise above the background—maybe just an eighth or quarter inch. It helps you get a feel for depth without getting overwhelmed.
Practice undercutting to create shadows and definition. A few small angled cuts beneath raised areas can really make things pop visually.
Watch how light plays across your carved surfaces. Understanding the way shadows fall will help you plan cuts that actually look three-dimensional.
Which Dremel bits are best suited for detailed relief carving in wood?
High-speed steel bits work nicely for softwoods like pine and basswood. The 191 and 192 bits are pretty reliable for fine details in those woods.
Carbide bits shine when you're working with hardwoods, giving you cleaner cuts. The 9901 and 9903 structured tooth bits clear out material fast and leave things smooth.
Ball-shaped bits are great for making rounded recesses and blending surfaces. They're especially useful for organic shapes—think flower petals or rounded corners.
Pointed bits come in handy for sharp lines and texture. The 107 engraving bit lets you add small decorative details and crisp lines without much fuss.
Cylindrical bits are your go-to for straight channels and cleaning up background areas. They help you keep a consistent depth across bigger flat spaces.
Can you recommend any beginner-friendly Dremel wood carving projects with guides?
Leaf patterns are a solid place to start. Trace a maple or oak leaf, then try raising the veins and dropping the background a bit for contrast.
Wooden spoons give you a chance to practice on curved surfaces. Try carving simple geometric or floral designs into the handles.
Relief name plaques are perfect for learning depth variation. Raise the letters up from the background and maybe add a decorative border.
Coaster sets are good for practicing repetitive cuts. Making several matching pieces helps you get more consistent with your carving depth.
Small decorative boxes give you both flat and curved surfaces to experiment with. You can try out different techniques on each side if you want.
What types of wood are ideal for creating relief carvings using a rotary tool?
Basswood is probably the easiest to work with—soft, fine-grained, and it takes detail really well without tearing out.
Pine is cheap and good for practice. Just pick clear pieces without knots for the smoothest results.
Poplar is a step up in density from pine but still carves easily if your bits are sharp. It’s a nice middle ground.
Butternut has beautiful grain and is medium-hard. It stains well and really shows off carved details.
If you’re just starting out, skip very hard woods like oak or maple. They’ll make your life harder until you’ve got more experience and stronger tools.
How do you determine the appropriate thickness of wood for initiating a relief carving project?
Start by planning your deepest cuts, then tack on at least a quarter inch for the background. That way, you won't risk carving all the way through your piece.
For simple relief carvings, grab a 3/4 inch thick board at minimum. That thickness usually gives you enough room for carved areas about a quarter to three-eighths of an inch deep.
If you’re aiming for a more complex, multi-level design, bump up to 1 to 1.5 inch thick material. You’ll need that extra depth if you want dramatic background removal or several depth layers.
Think about how you’ll mount the finished piece, too. Wall-hung carvings need enough wood behind the carved areas so you can securely attach hangers or fasteners.
Before you start, mark the maximum carving depth right on the wood’s edges. It’s a simple trick, but it’ll help keep you from going too deep as you work.